This lesson walks you through every section of the New Generation form, from opening it to hitting Trigger Workflow.
Step 1 — Open the New Generation form
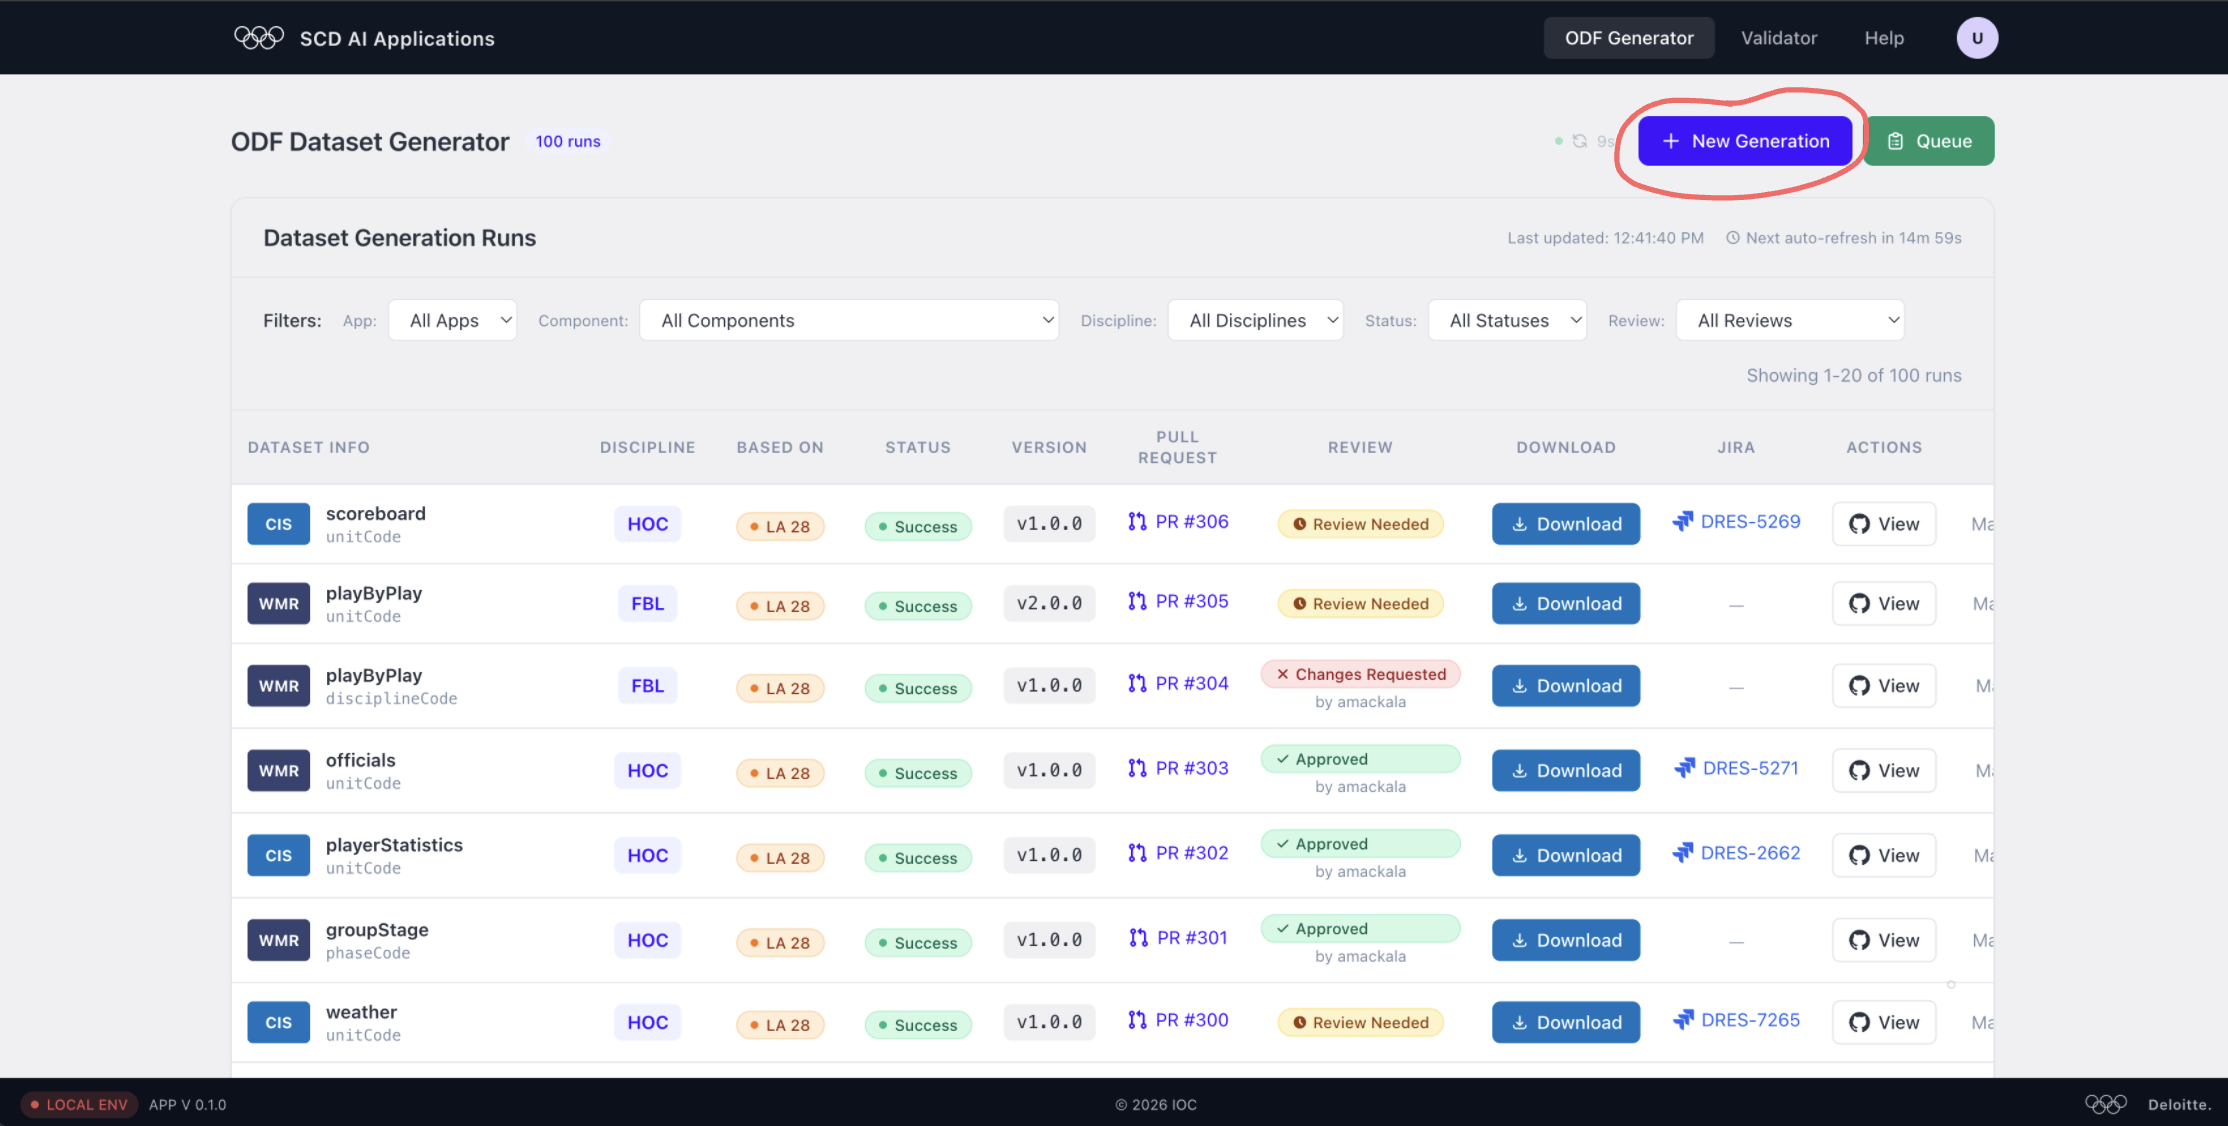
The ODF Dataset Generator home page lists all past runs. Click + New Generation (top-right) to open the generation form.
Step 2 — Choose your input source
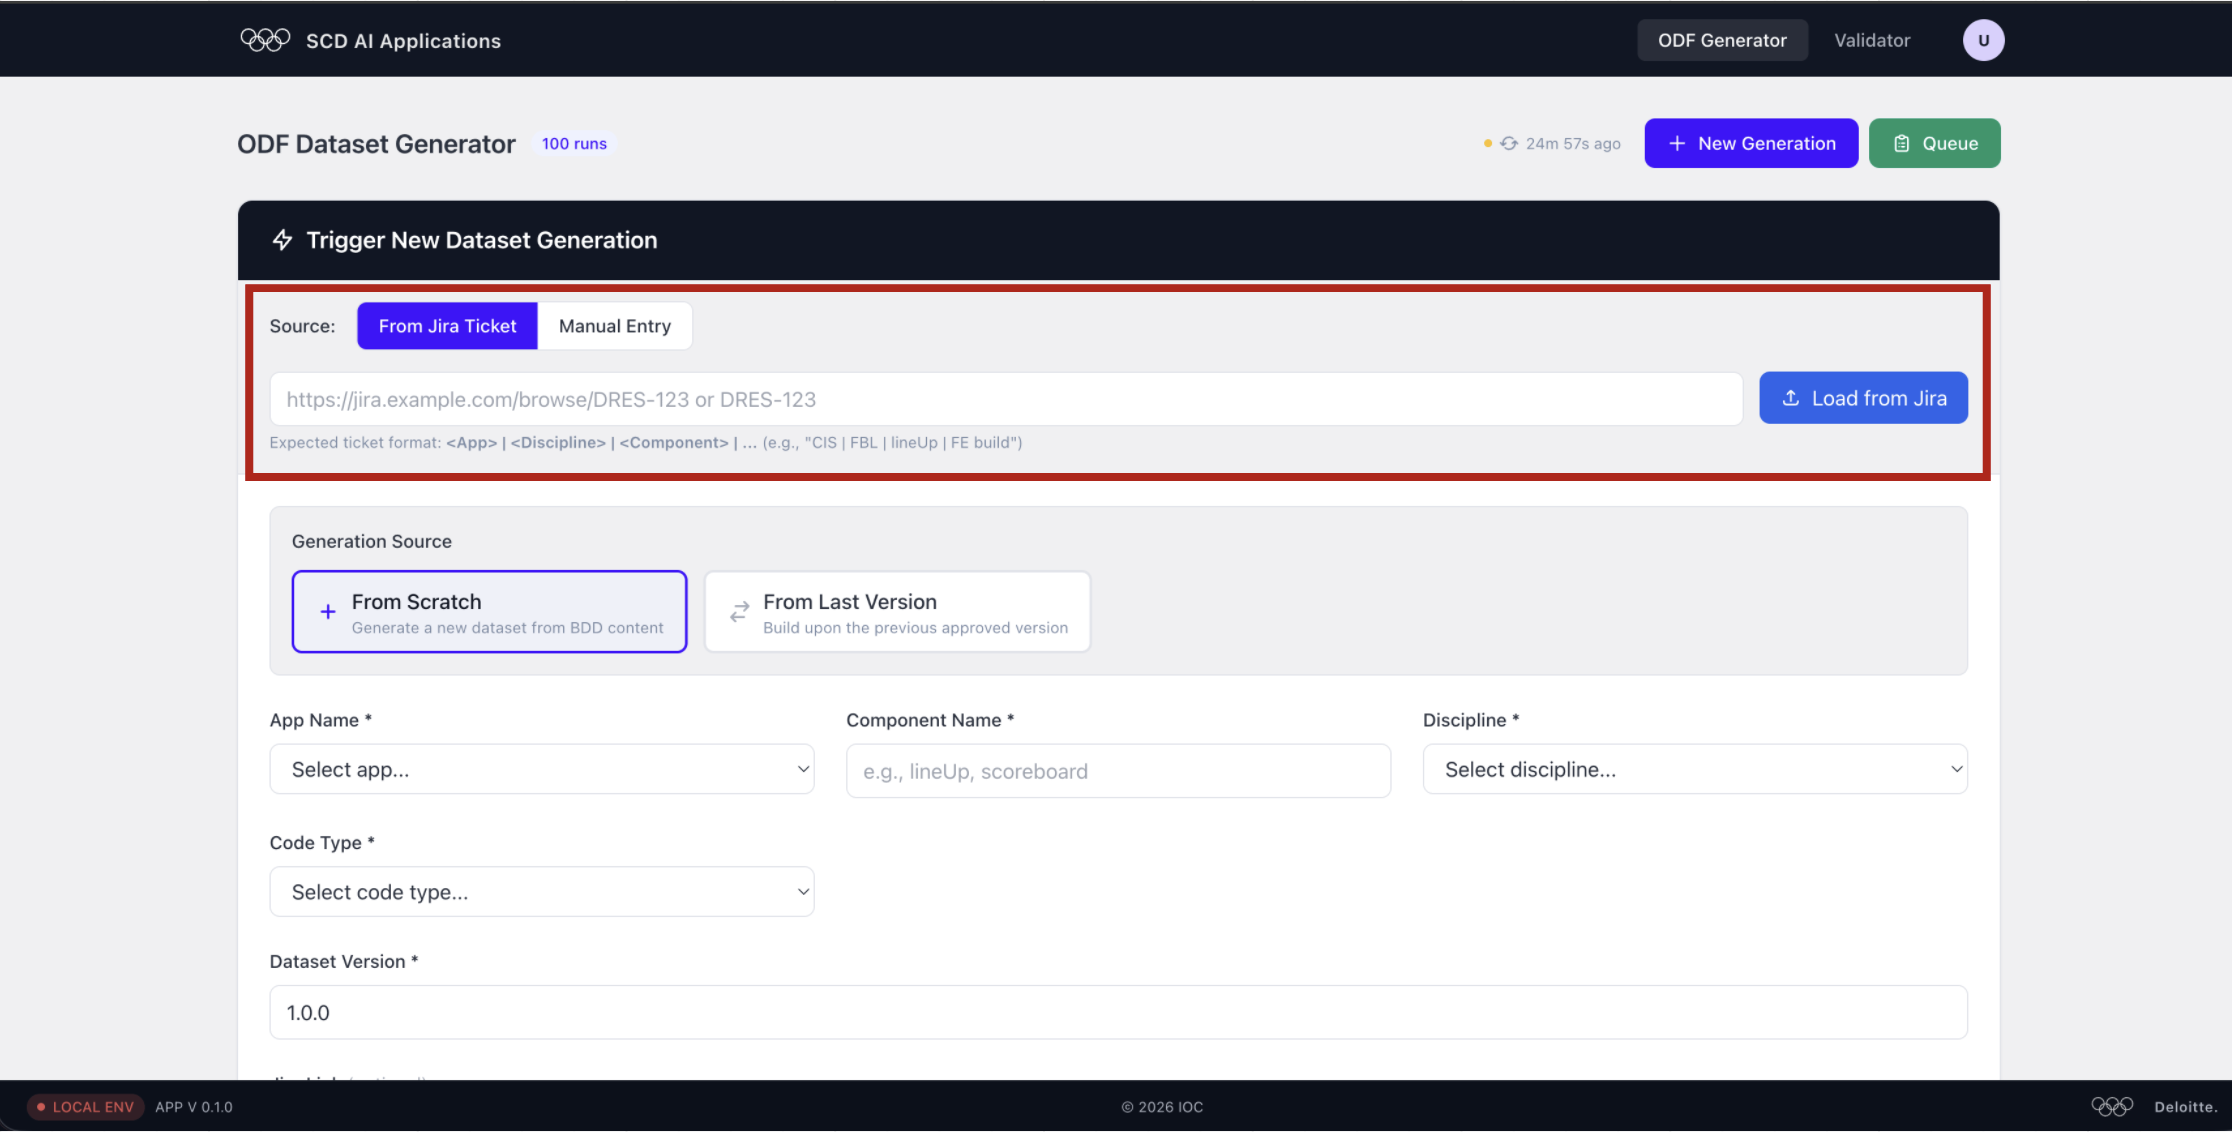
Pick how you want to supply the job parameters:
- From Jira Ticket — paste a ticket URL or key (e.g.
DRES-123) and click Load from Jira to auto-fill all fields. - Manual Entry — fill every field by hand.
Step 3 — Select the generation source
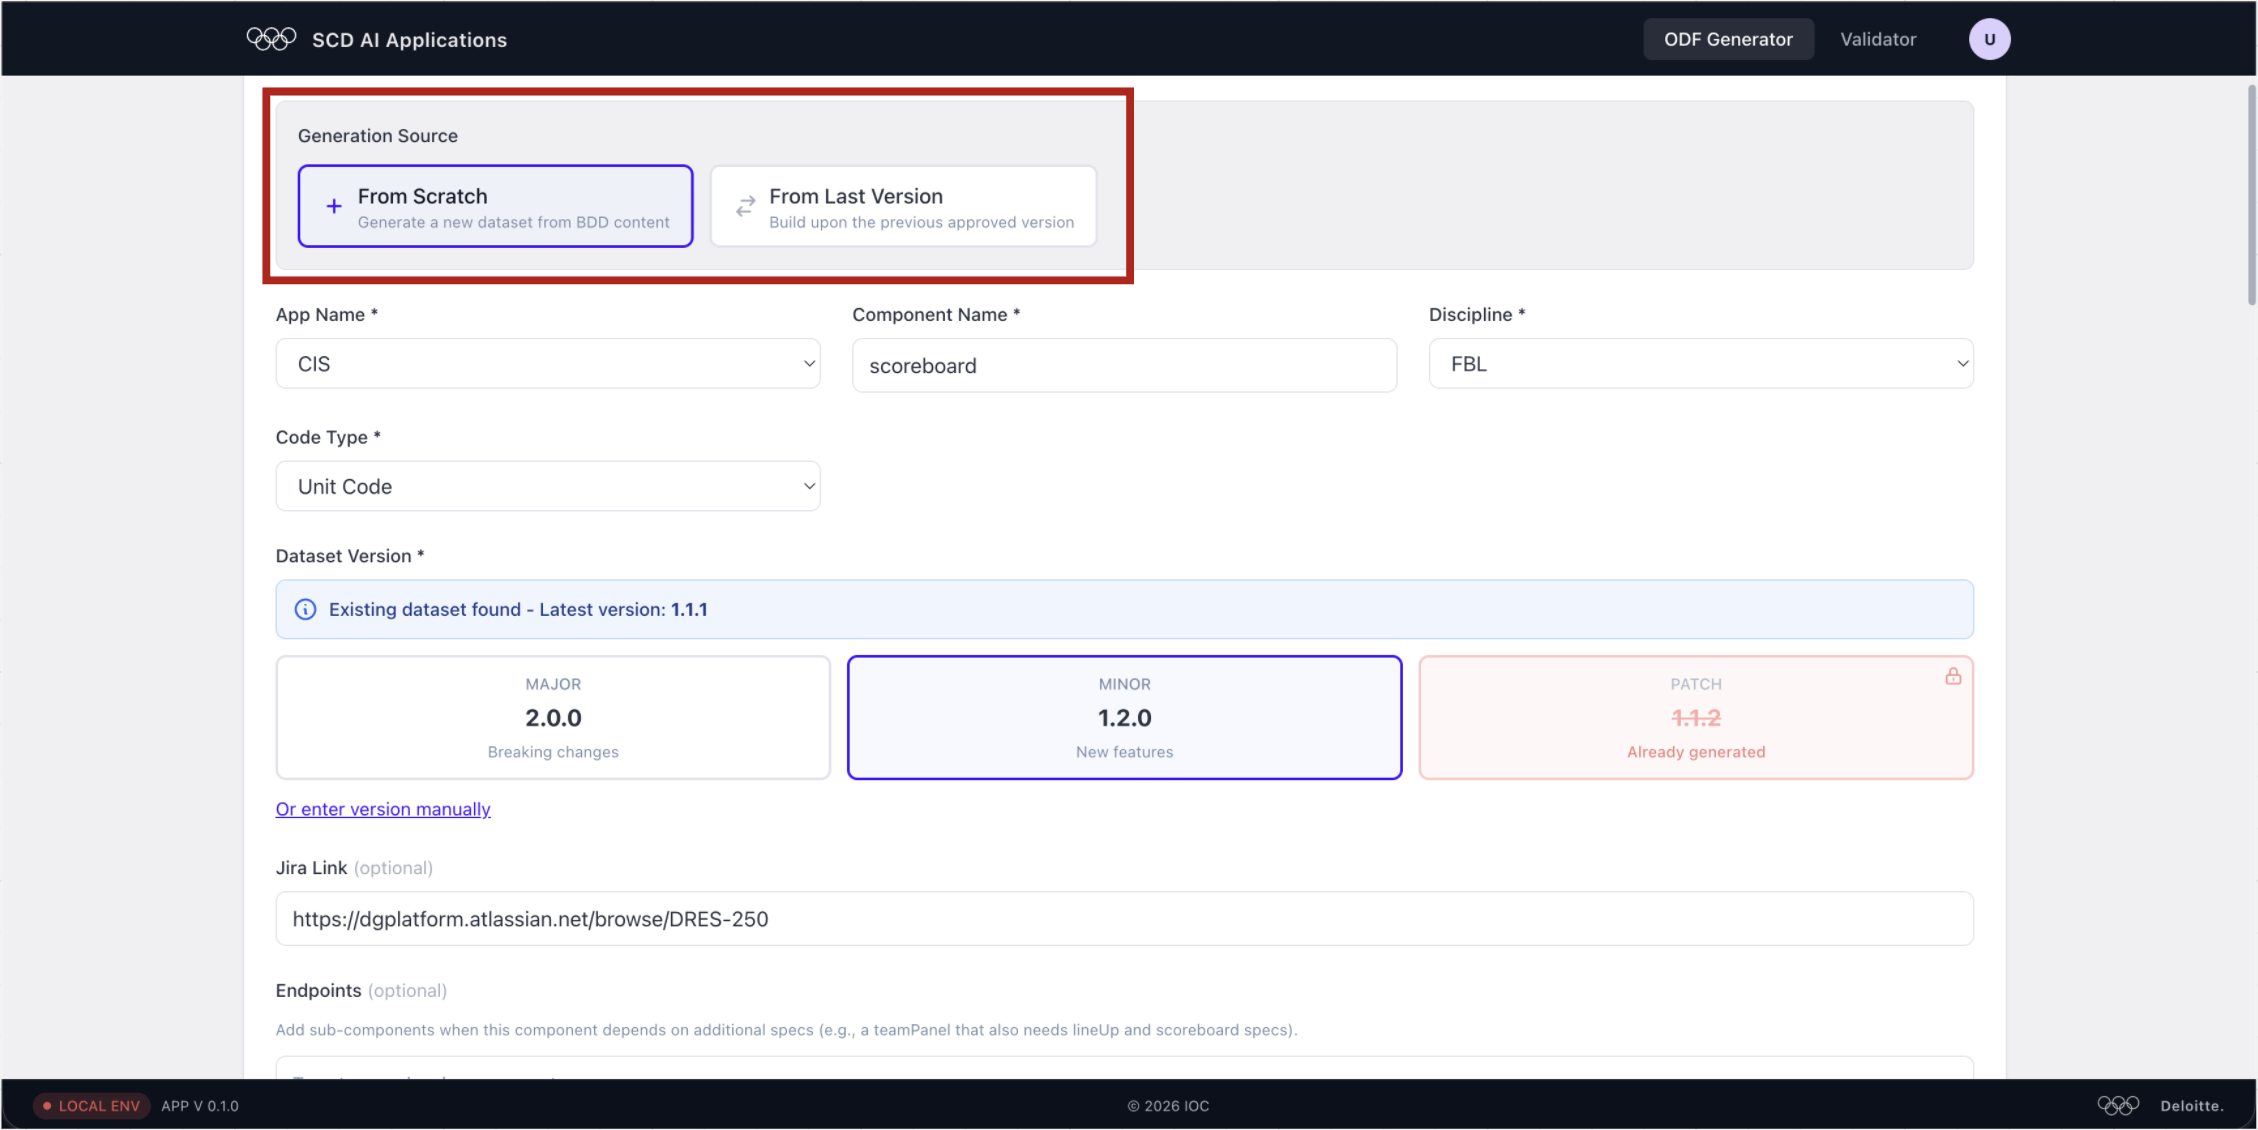
Choose how the dataset should be built:
- From Scratch — generates a brand-new dataset from BDD content.
- From Last Version — builds on top of the previous approved version (incremental update).
Step 4 — Fill in component details
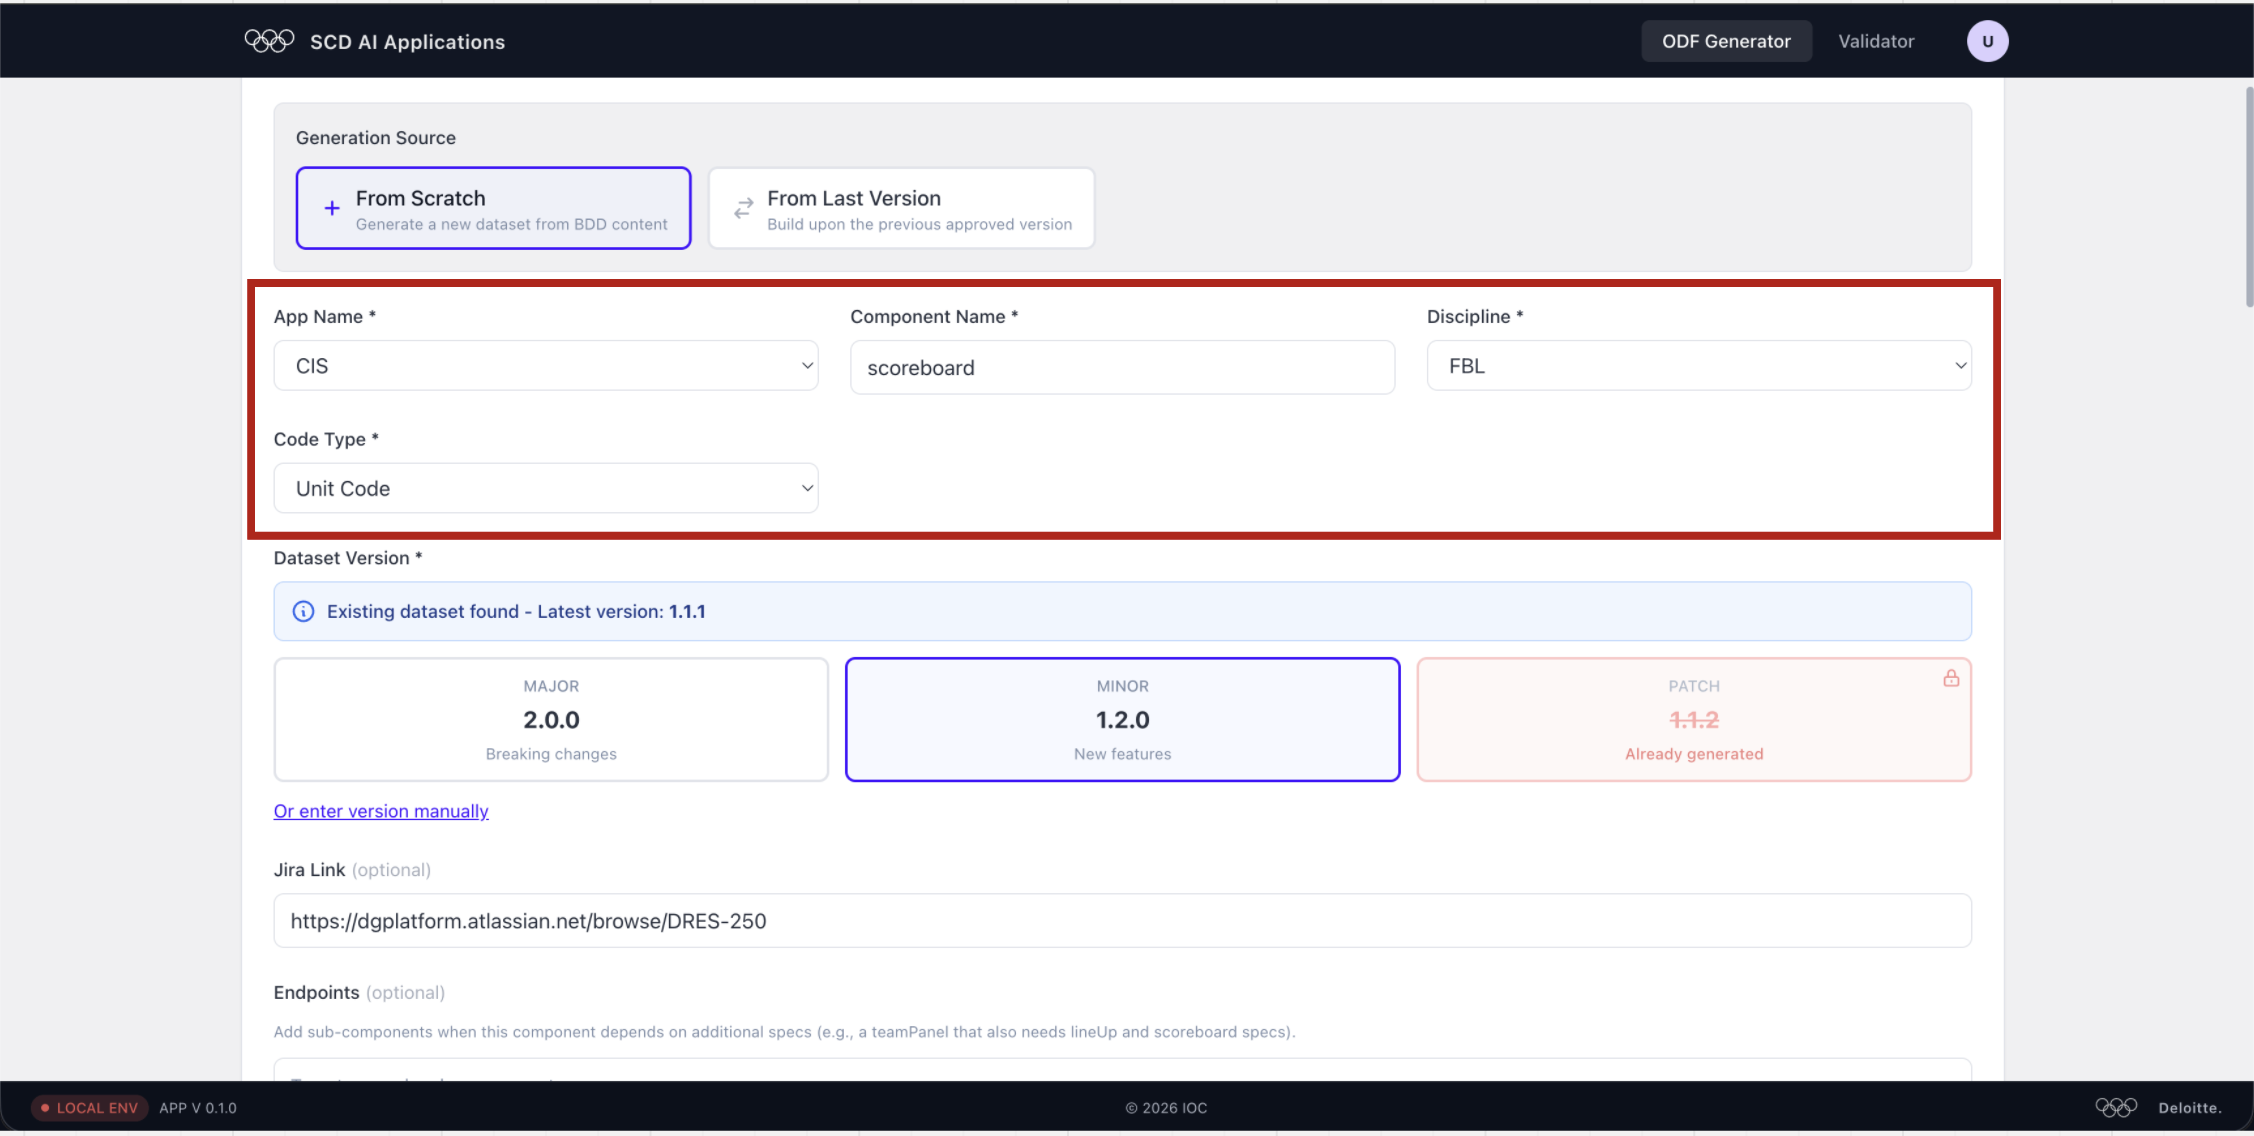
Identify the component being generated:
| Field | Description |
|---|---|
| App Name | The application this dataset belongs to (e.g. CIS, WMR) |
| Component Name | The UI component (e.g. scoreboard, lineUp) |
| Discipline | Sport code (e.g. FBL, HOC) |
| Code Type | Type of code driving the component (e.g. Unit Code, Phase Code) |
Step 5 — Pick the dataset version
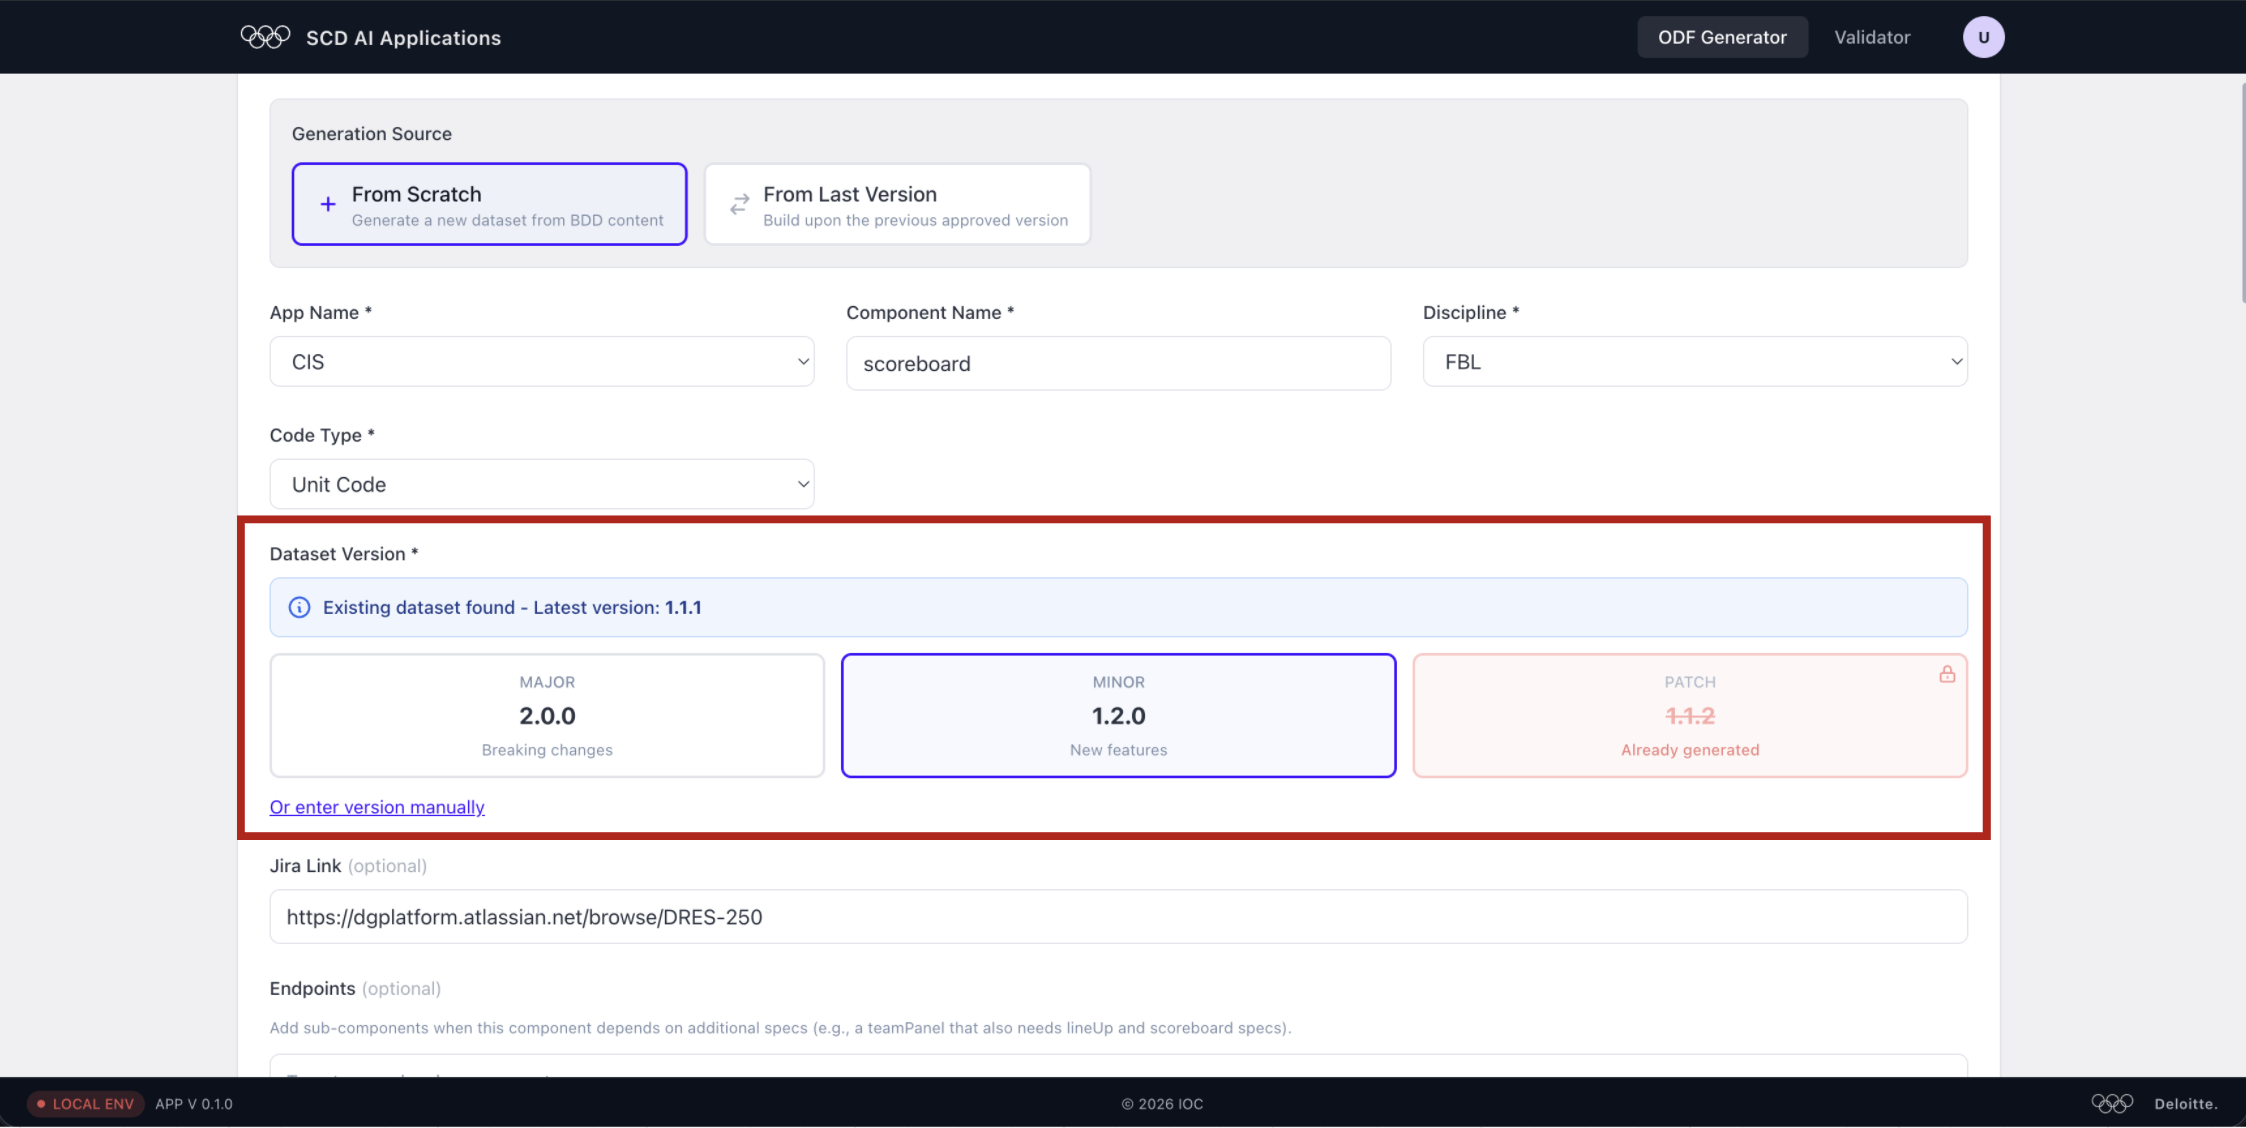
The system detects any existing dataset and suggests the next version:
- MAJOR — breaking changes (resets minor/patch).
- MINOR — new features added.
- PATCH — already generated (locked, shown in red if taken).
Select the version bump that matches your change, or use Or enter version manually.
Step 6 — Add endpoints (optional)

Endpoints are sub-components whose specs are also needed to generate this dataset (e.g. a teamPanel that depends on lineUp and scoreboard specs).
- Type a component name and select from the list.
- Matched YAML specs are shown below the chip (e.g.
DEFAULT,FBL).
Step 7 — Select the competition reference data
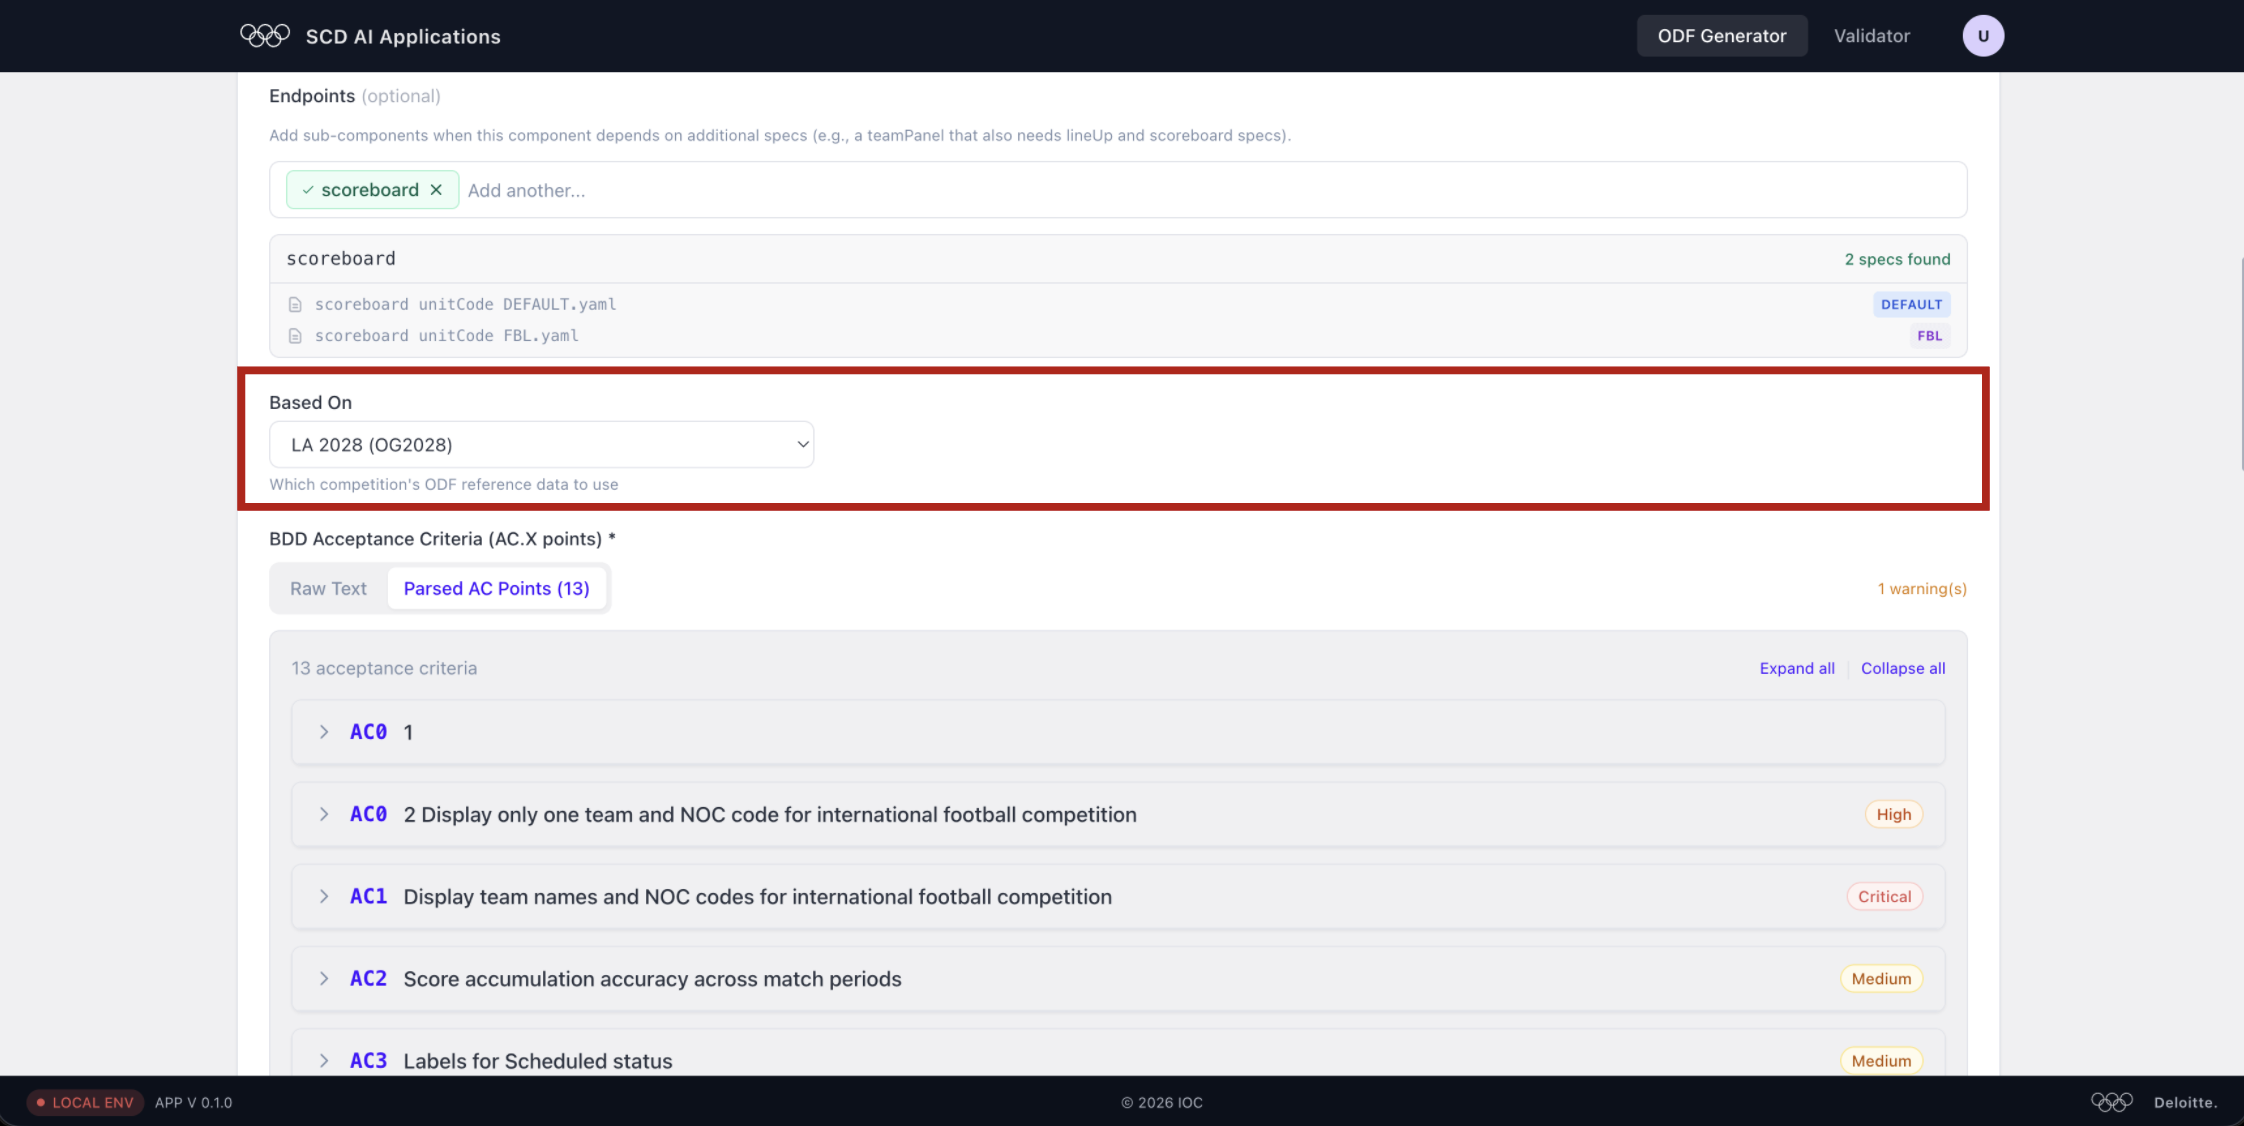
The Based On dropdown sets which competition's ODF reference data the generator uses to populate realistic values (e.g. LA 2028 (OG2028)).
Step 8 — Review parsed acceptance criteria
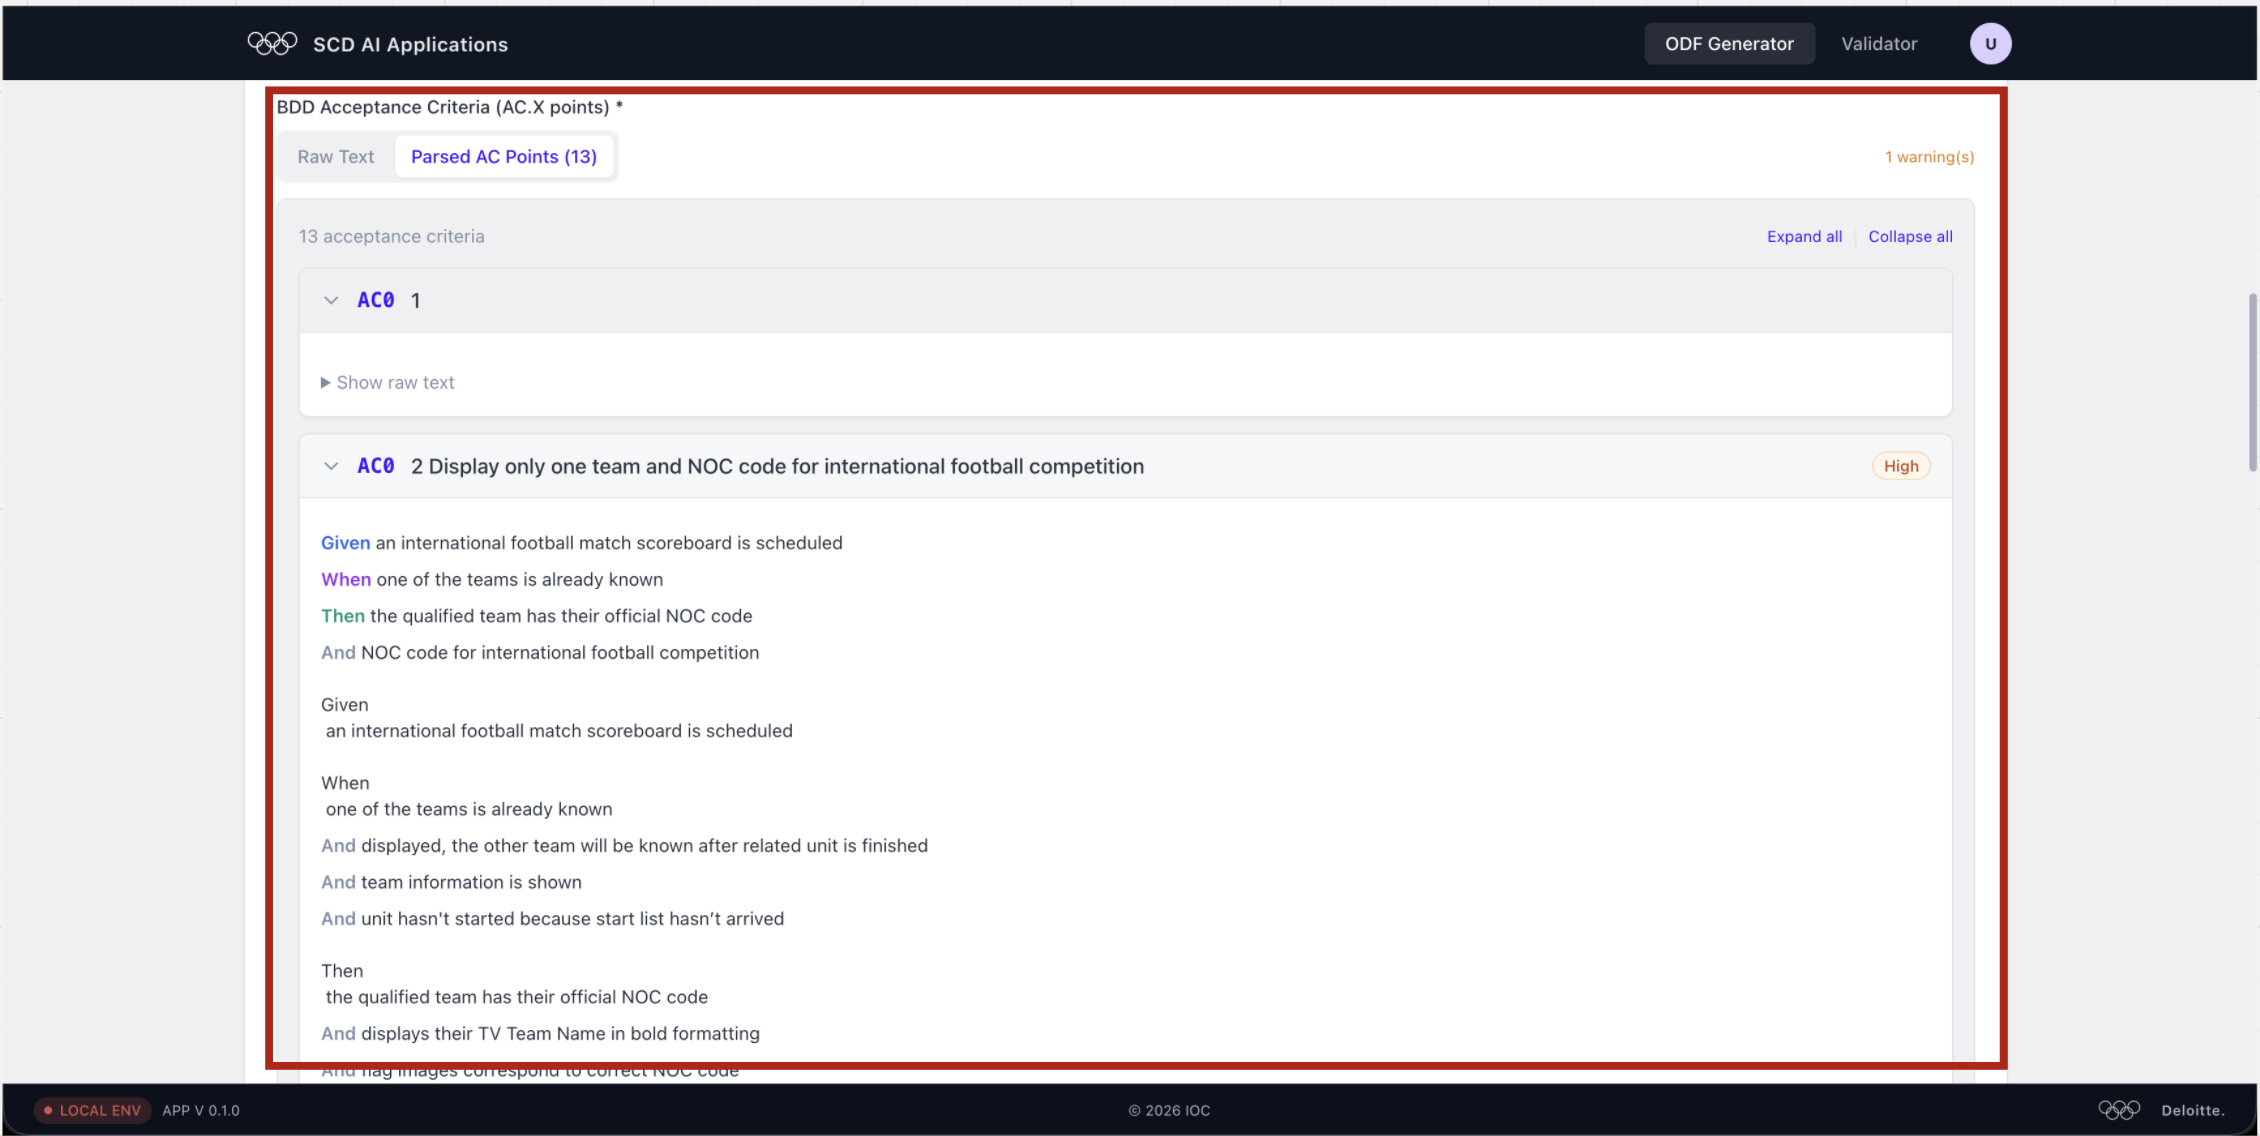
Paste BDD acceptance criteria in the text area. Switch to the Parsed AC Points tab to verify the parser correctly split your text into individual ACs with Given/When/Then steps and severity labels (Critical, High, Medium).
Warnings (shown top-right) indicate ACs that are structurally incomplete — fix them in the source before generating.
Step 9 — Trigger the workflow
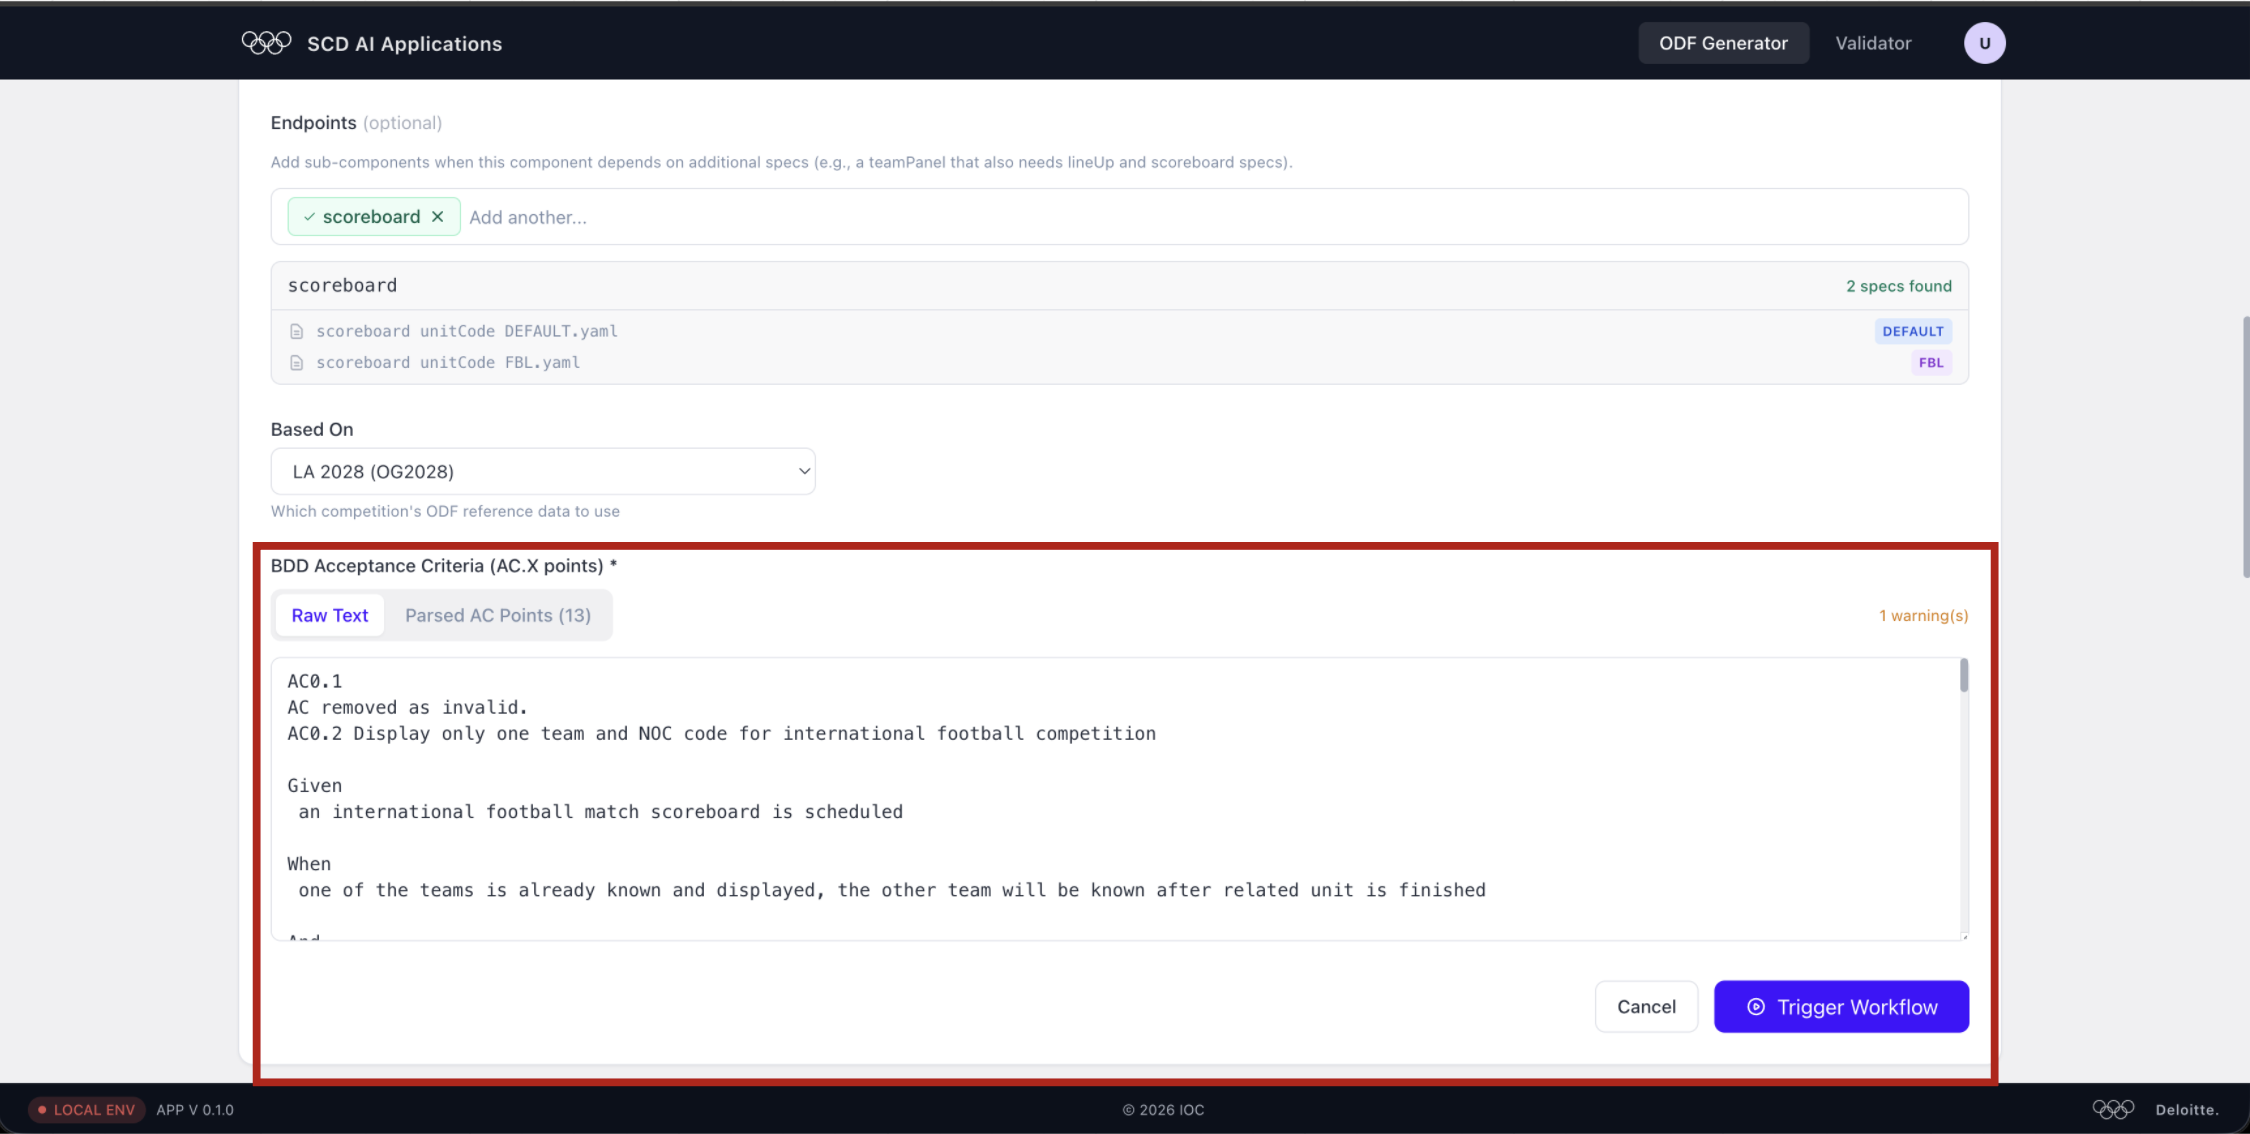
You can also use the Raw Text tab to inspect or edit the BDD input directly. When everything looks correct, click Trigger Workflow to start the generation run.
The run is queued immediately and appears in the runs list — you can track its live status from there.