With the validator report read and unknown XPaths investigated, you're ready to open the files and make a formal decision. This lesson continues the FBL | CIS | scoreboard | unitCode v1.2.0 (PR #307) example from the previous lesson.
⚠️ Important — auto-deletion policy
Datasets with a Review Needed status that have not been touched for more than 2 weeks are automatically deleted. If a dataset is sitting in your queue, make sure to act on it (approve, request changes, or leave a comment) before the two-week window expires. Once deleted, the dataset must be regenerated from scratch.
Reviewing the files
Step 4 — Review the files changed and add inline comments
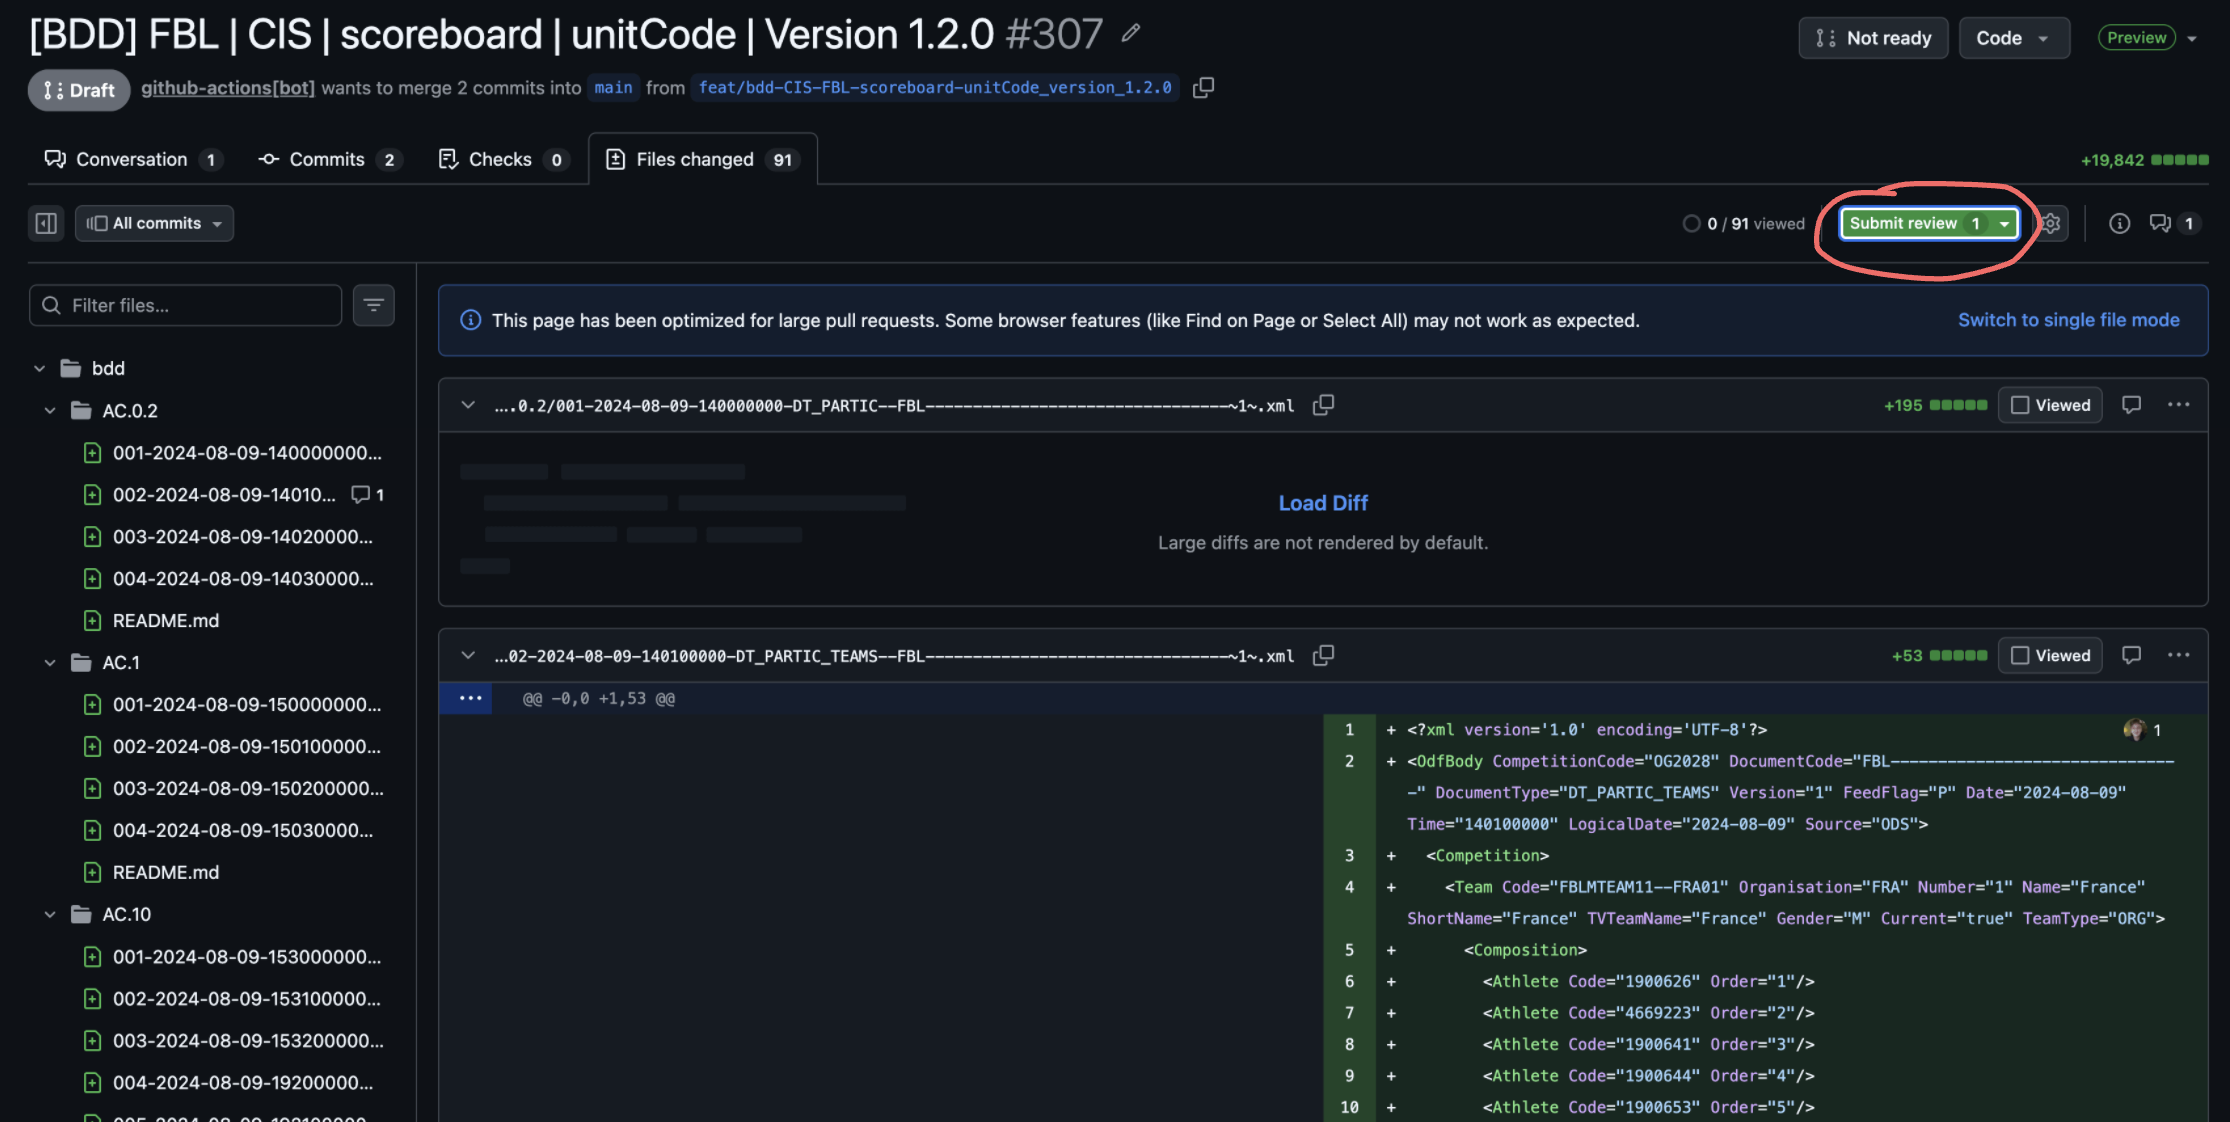
Switch to the Files changed tab. Work through the AC folders
(AC.0, AC.1, … AC.11) methodically.
For each AC folder:
- Open the README.md inside the folder and re-read the acceptance criterion being tested.
- Check every XML file in that folder against the README requirements.
- If you spot something wrong, add an inline comment directly on the offending line.
When writing a comment, always include a suggested change using GitHub's suggestion block so the fix can be applied with one click:
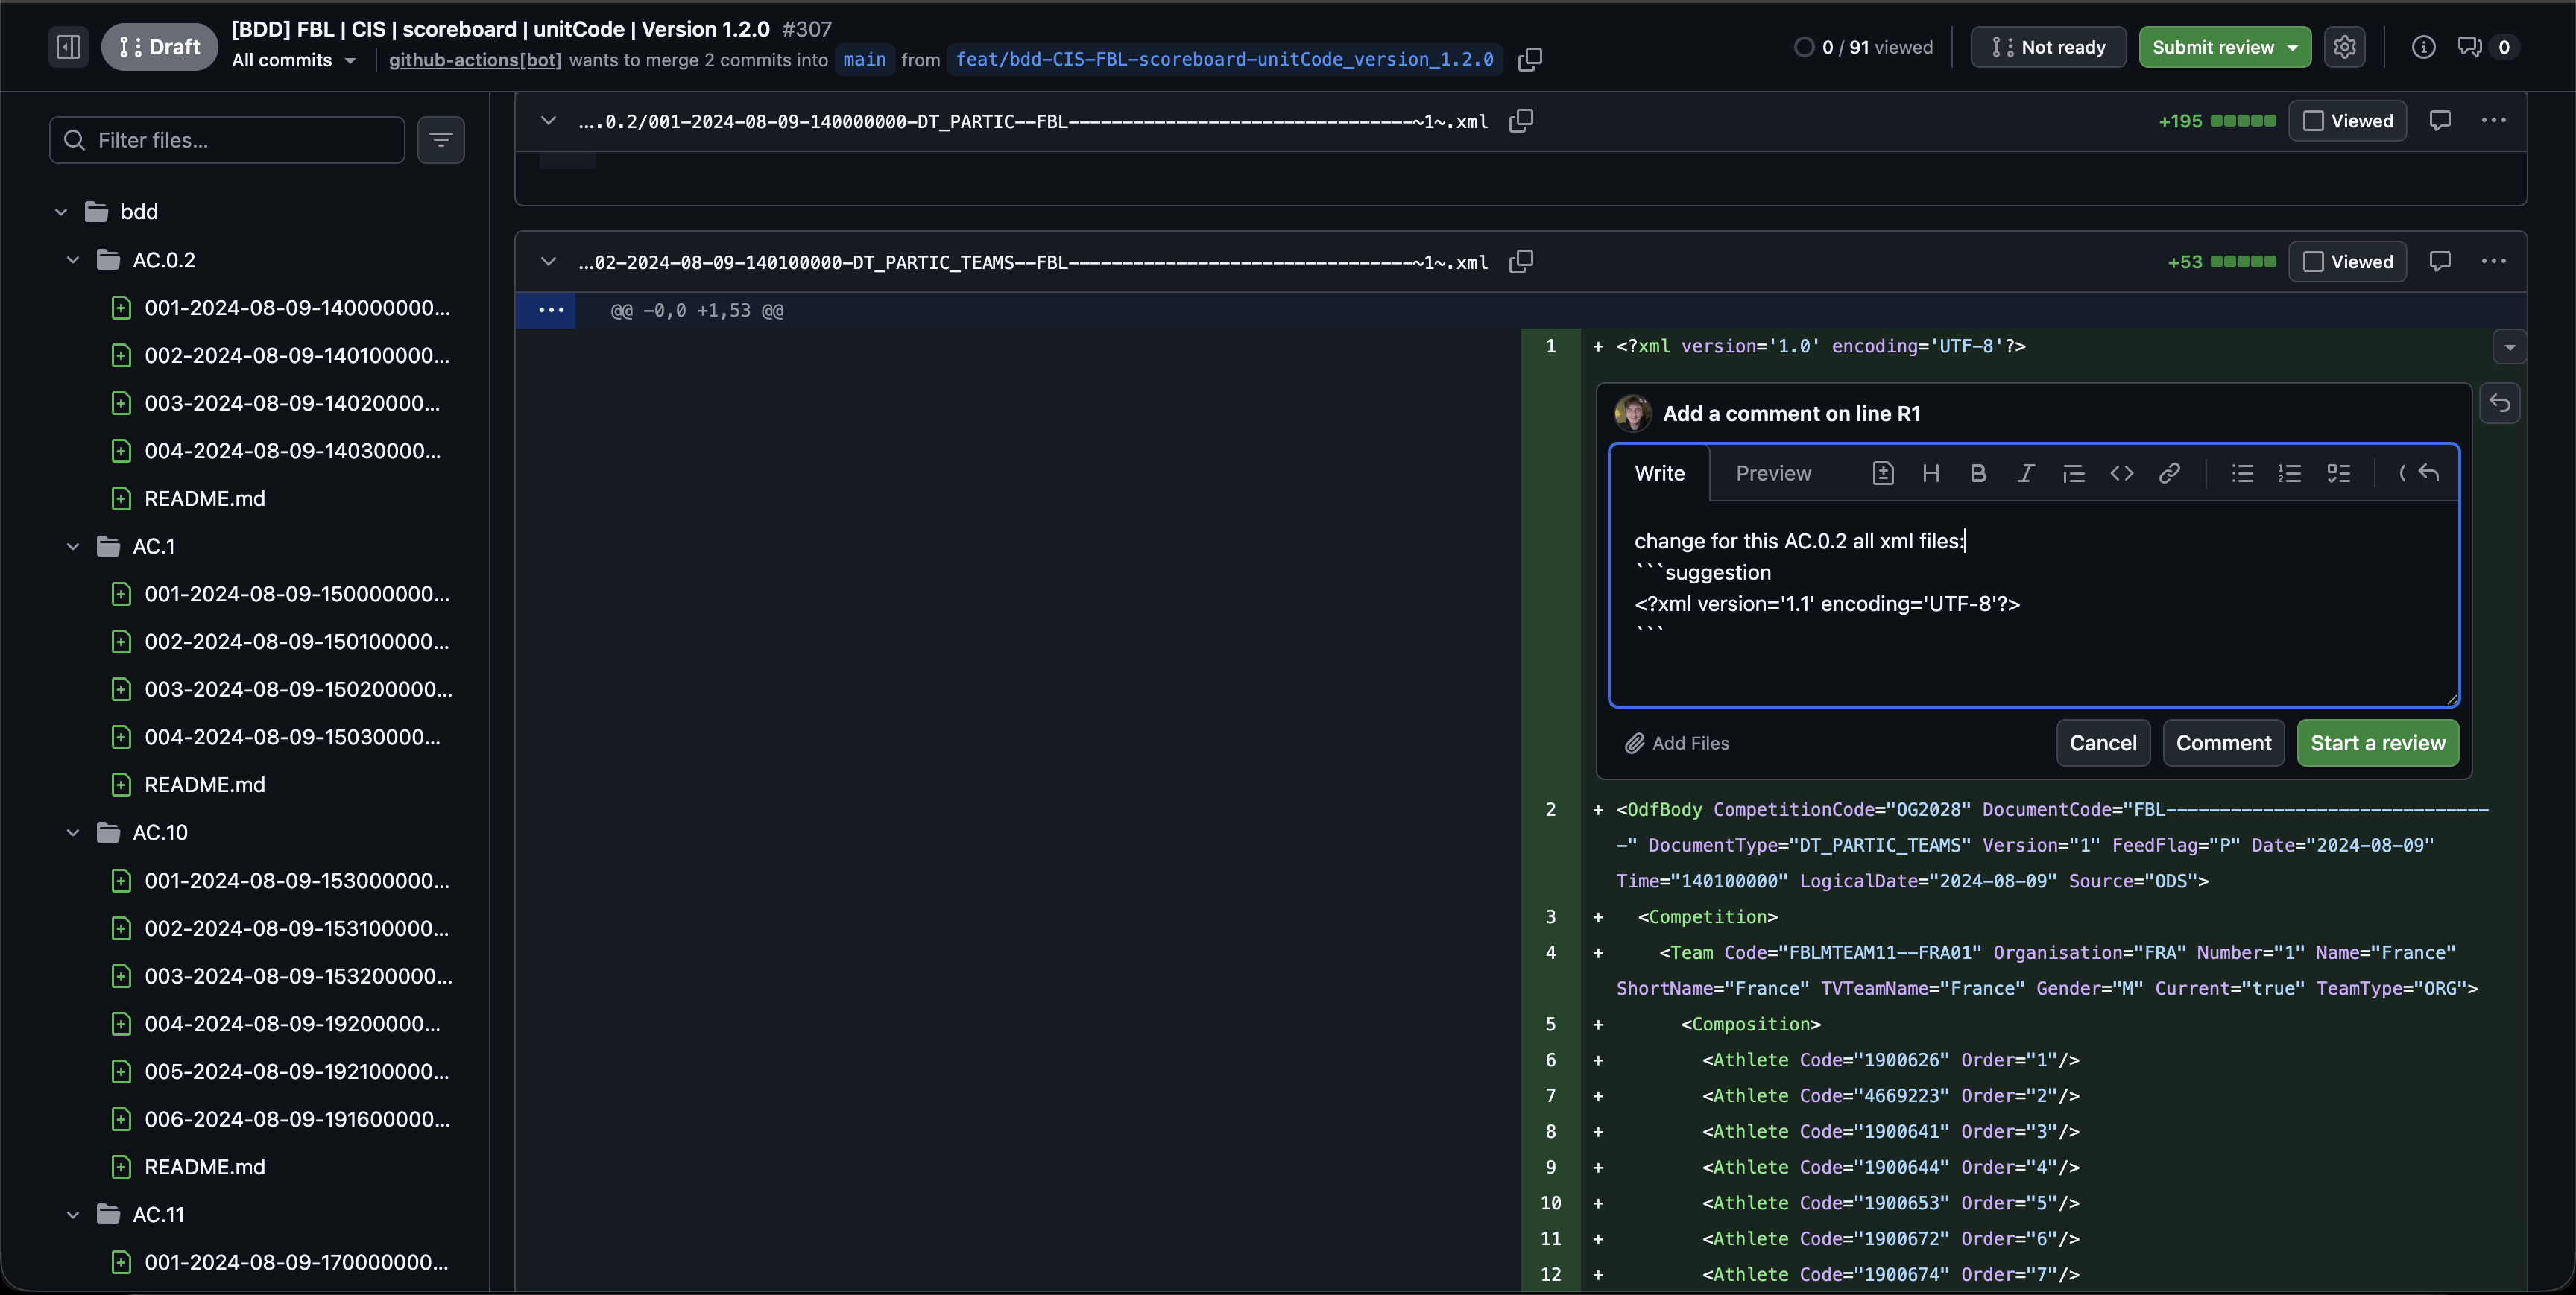
Scope your comment correctly
| Scope | When to use |
|---|---|
| Single line | A typo or wrong value in one specific file |
| This AC folder | The same problem repeats across all files in one AC (e.g. change for this AC.0.2 all xml files) |
| All DT_X files | A structural error that affects every file of a given message type across all ACs |
| Global | A generation assumption that is wrong everywhere (rare) |
Always state the scope explicitly in the comment body so the bot knows how many files to fix.
Step 5 — Submit your review
Once you've added all comments, click Submit review (top-right).
The Finish your review dialog opens. You'll see your pending comments listed so you can double-check before submitting.

Choose the right review outcome:
| Option | When to use |
|---|---|
| Comment | Observations only, no blocking issues |
| Approve | Dataset is correct — no changes needed |
| Request changes | One or more blocking issues must be fixed before approval |
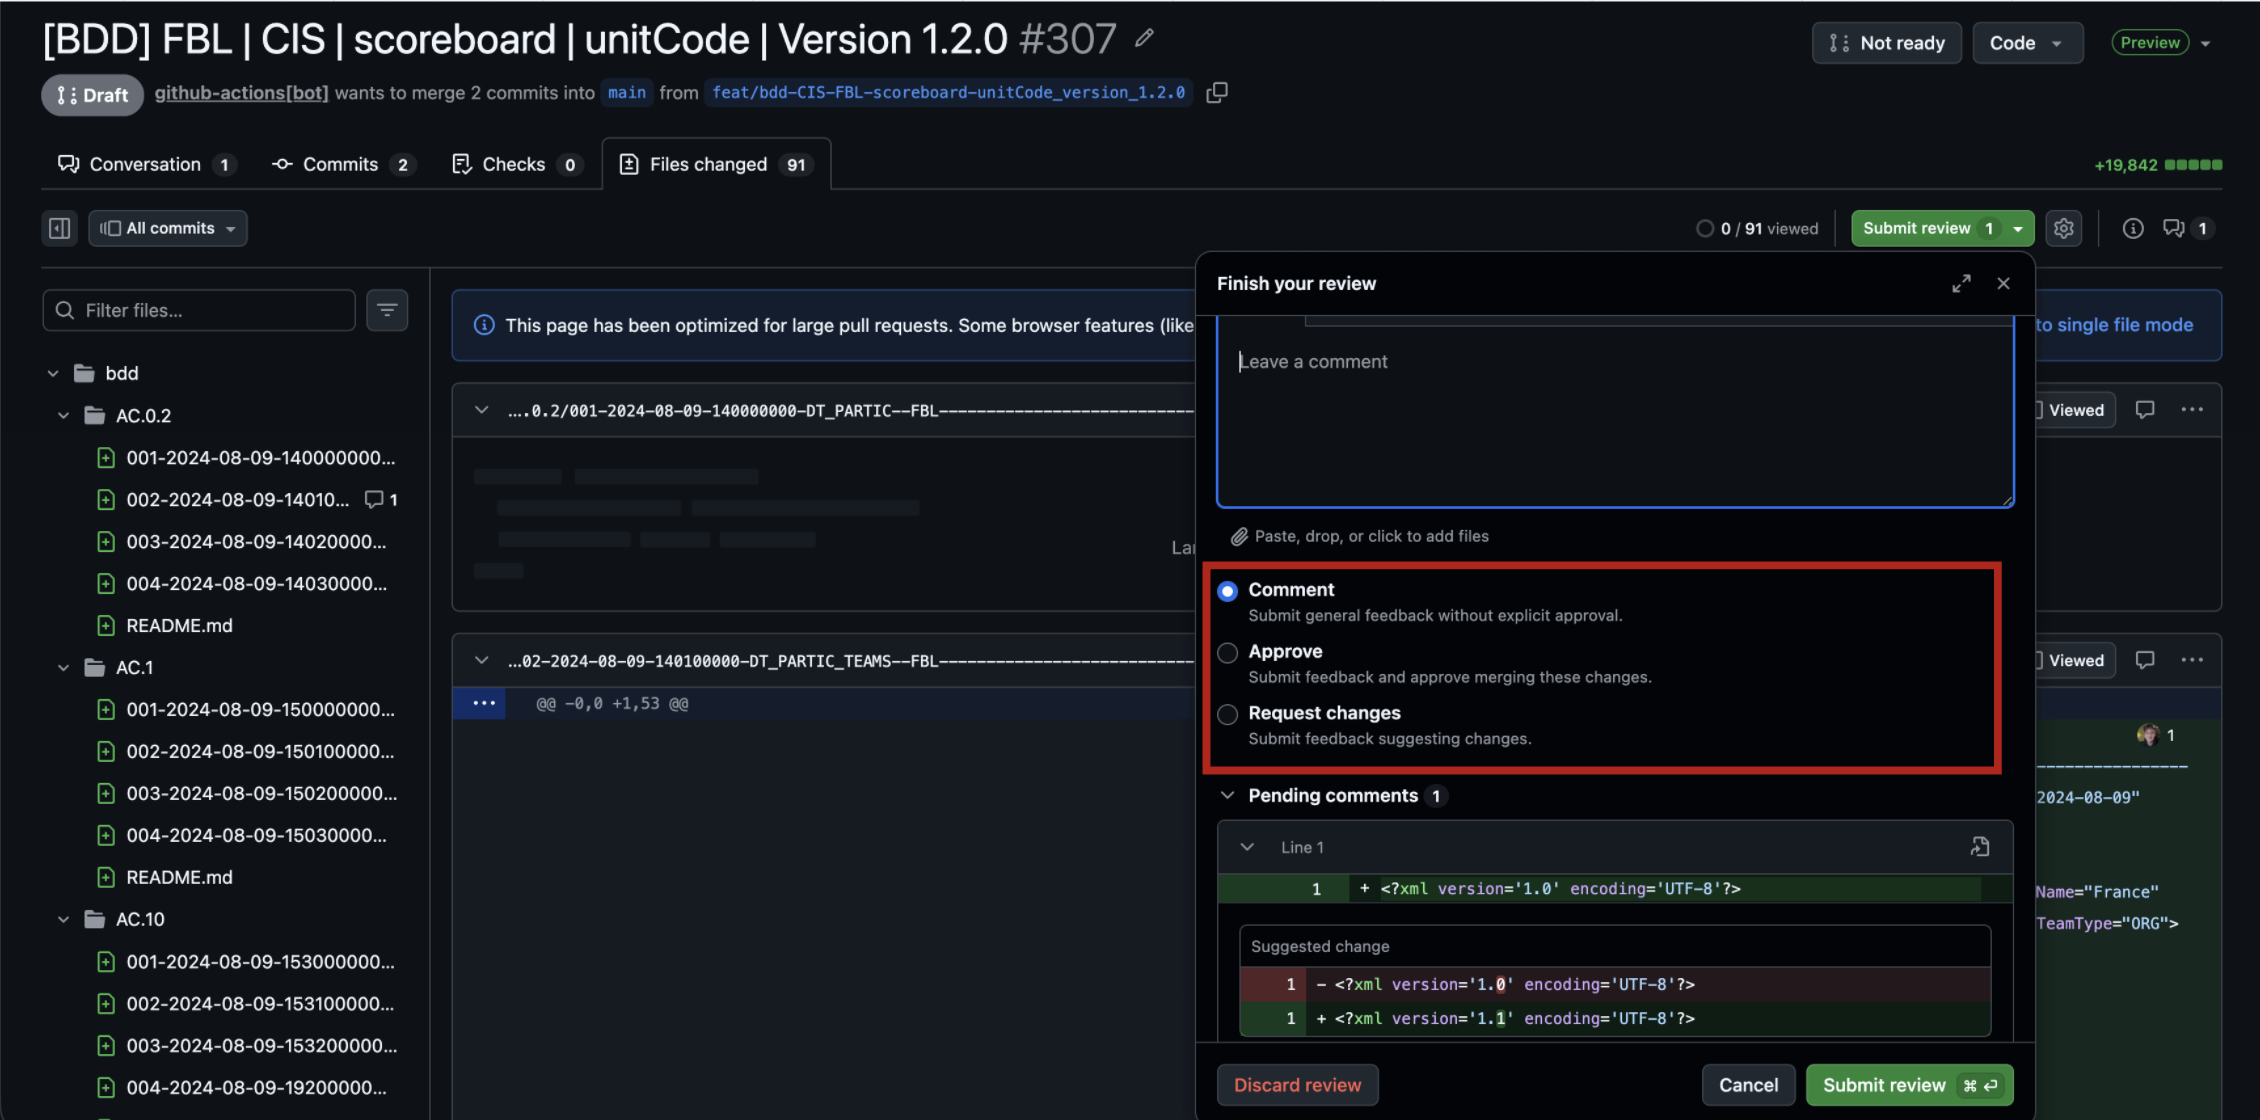
If you have inline change requests, always choose Request changes so the PR status updates visibly and the bot knows to trigger fixes.
Step 6 — Review status updates in the dashboard
After submitting, switch back to the ODF Generator dashboard. The row you reviewed now shows Changes Requested with your name.
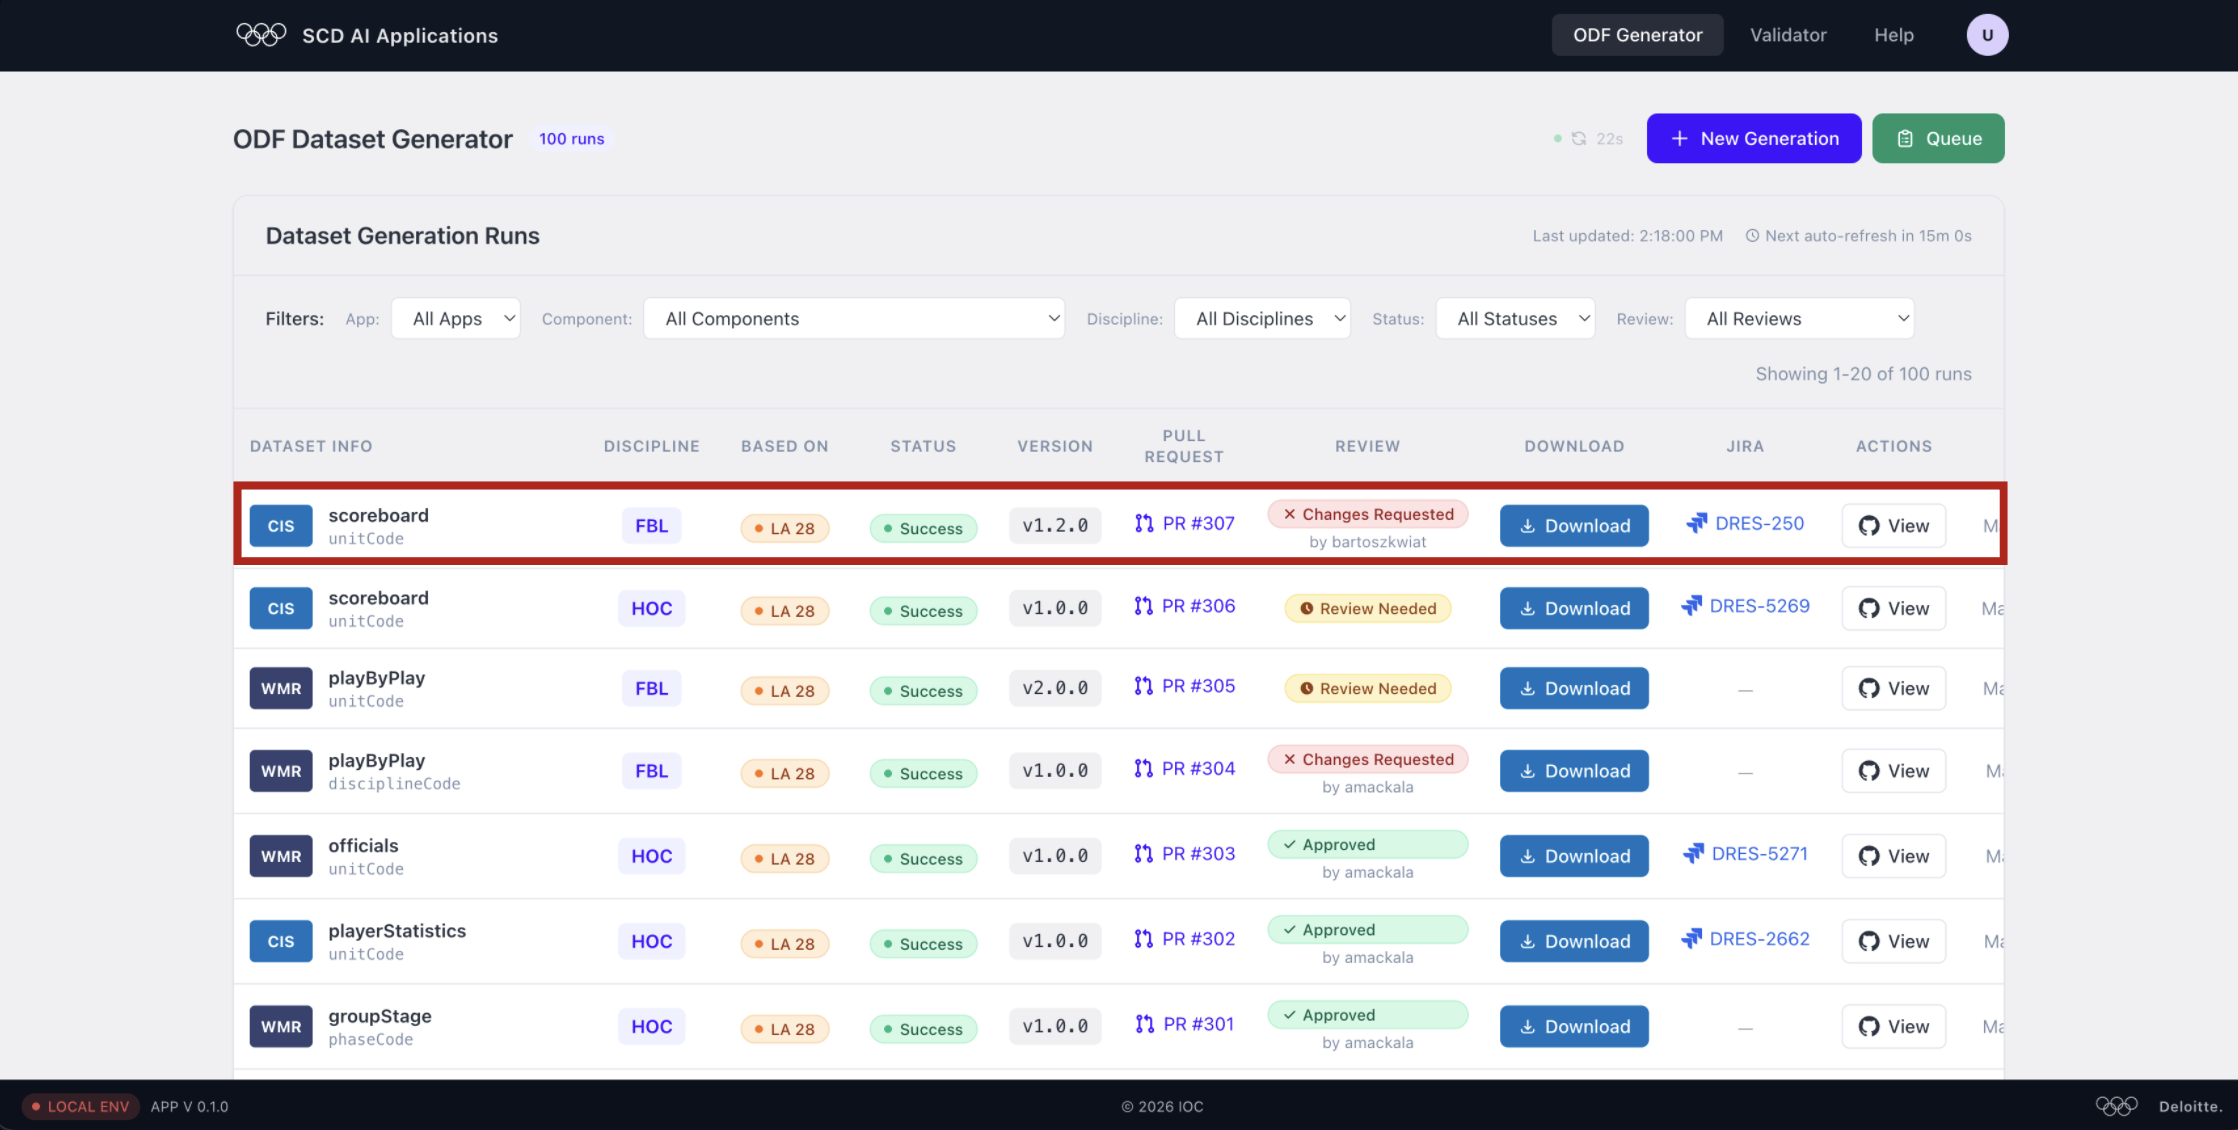
This status change signals to the team and to the automated bot that fixes are expected.
Approving the dataset
Step 7 — Wait for the bot to apply fixes
The BDD Review Bot reads your comments, applies the changes, and pushes new commits — typically within 5–15 minutes.
Return to the PR. You'll see new commits like fix: address review feedback (#307) and a fresh bot comment summarising what was changed.
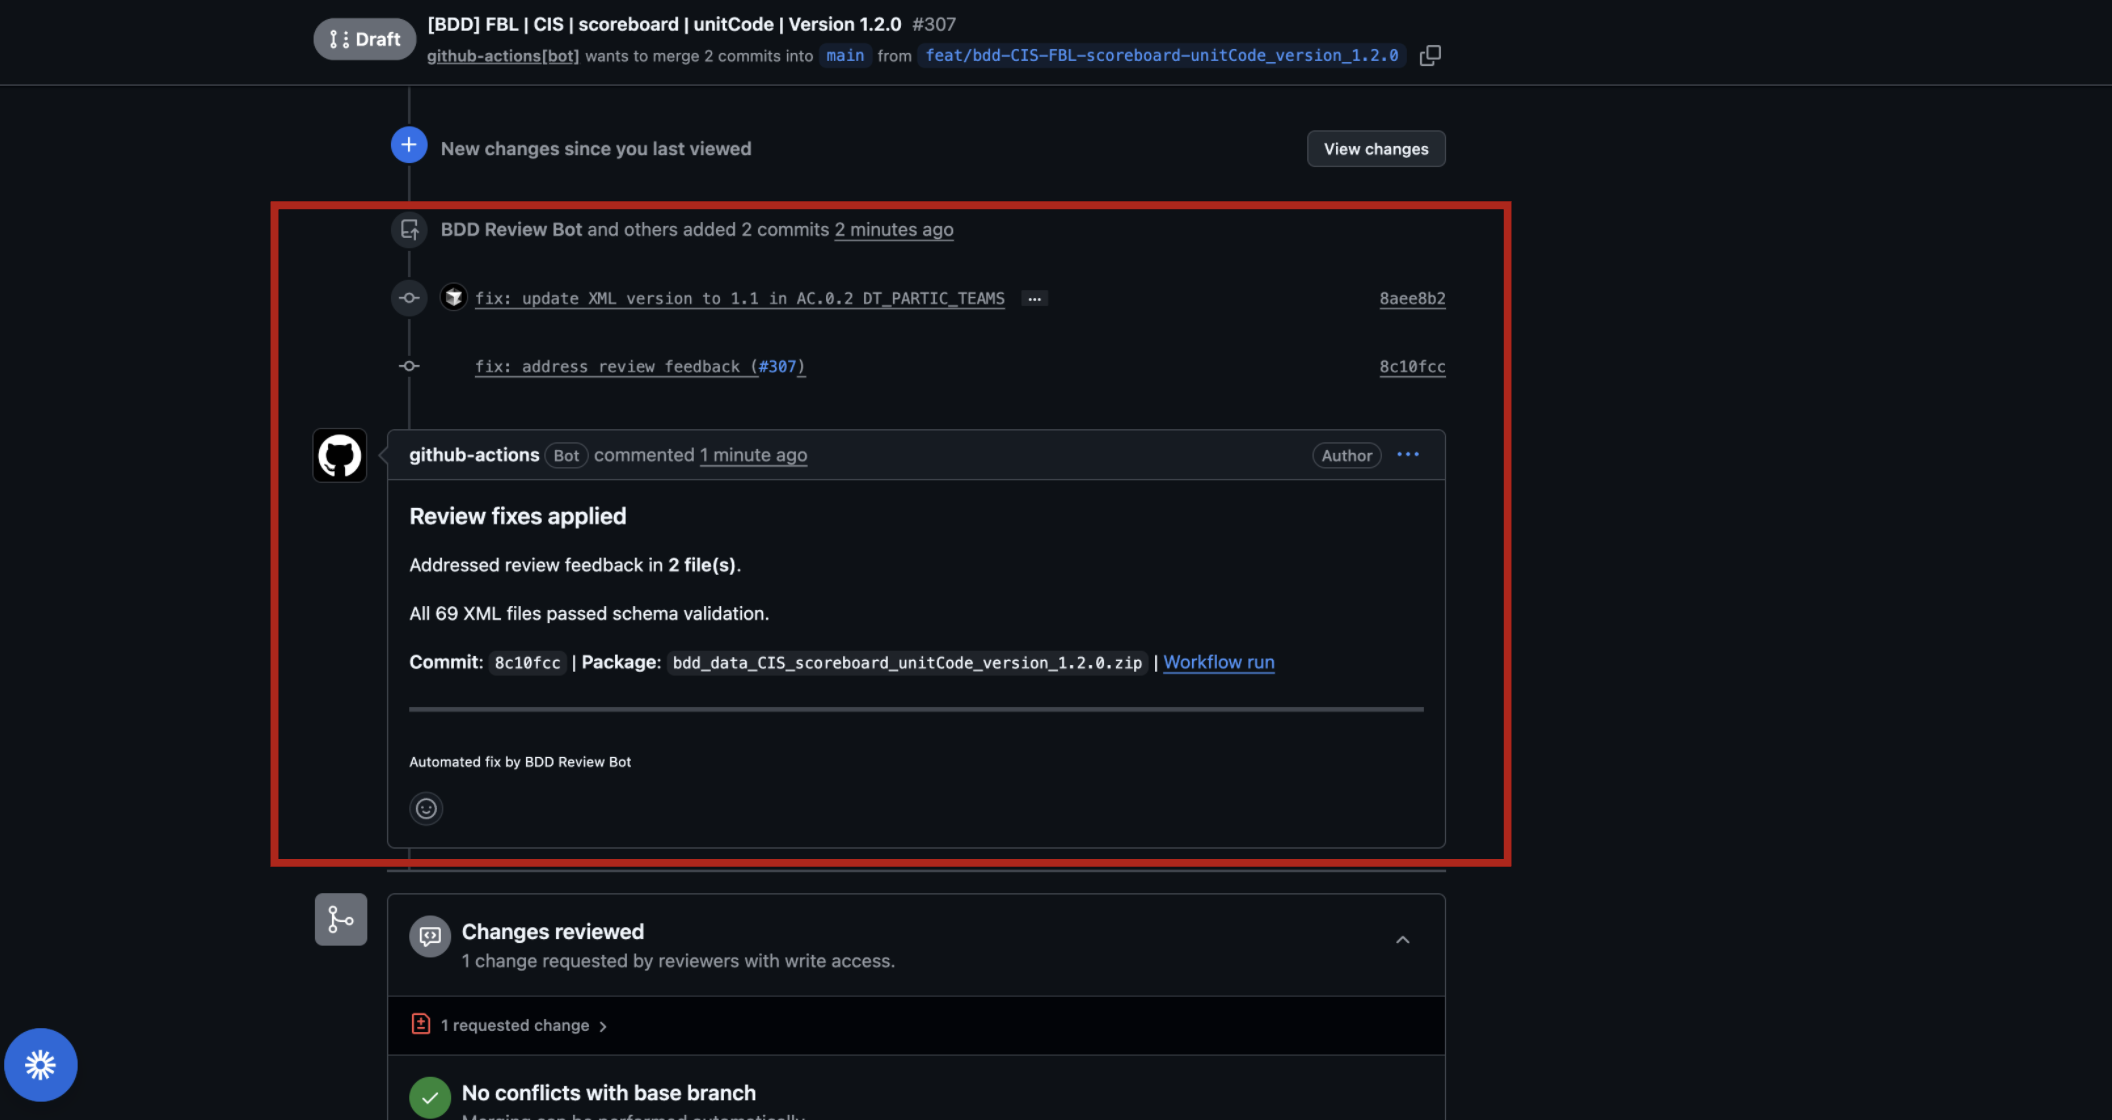
Check the summary carefully:
- Addressed review feedback in N file(s) — confirms the bot processed your comments.
- All N XML files passed schema validation — confirms no structural regressions were introduced by the fixes.
Step 8 — Re-review and approve
Click View changes (or open Files changed filtered to the new commits) and verify the bot's fixes are correct.
If everything looks good, click Submit review → Approve.
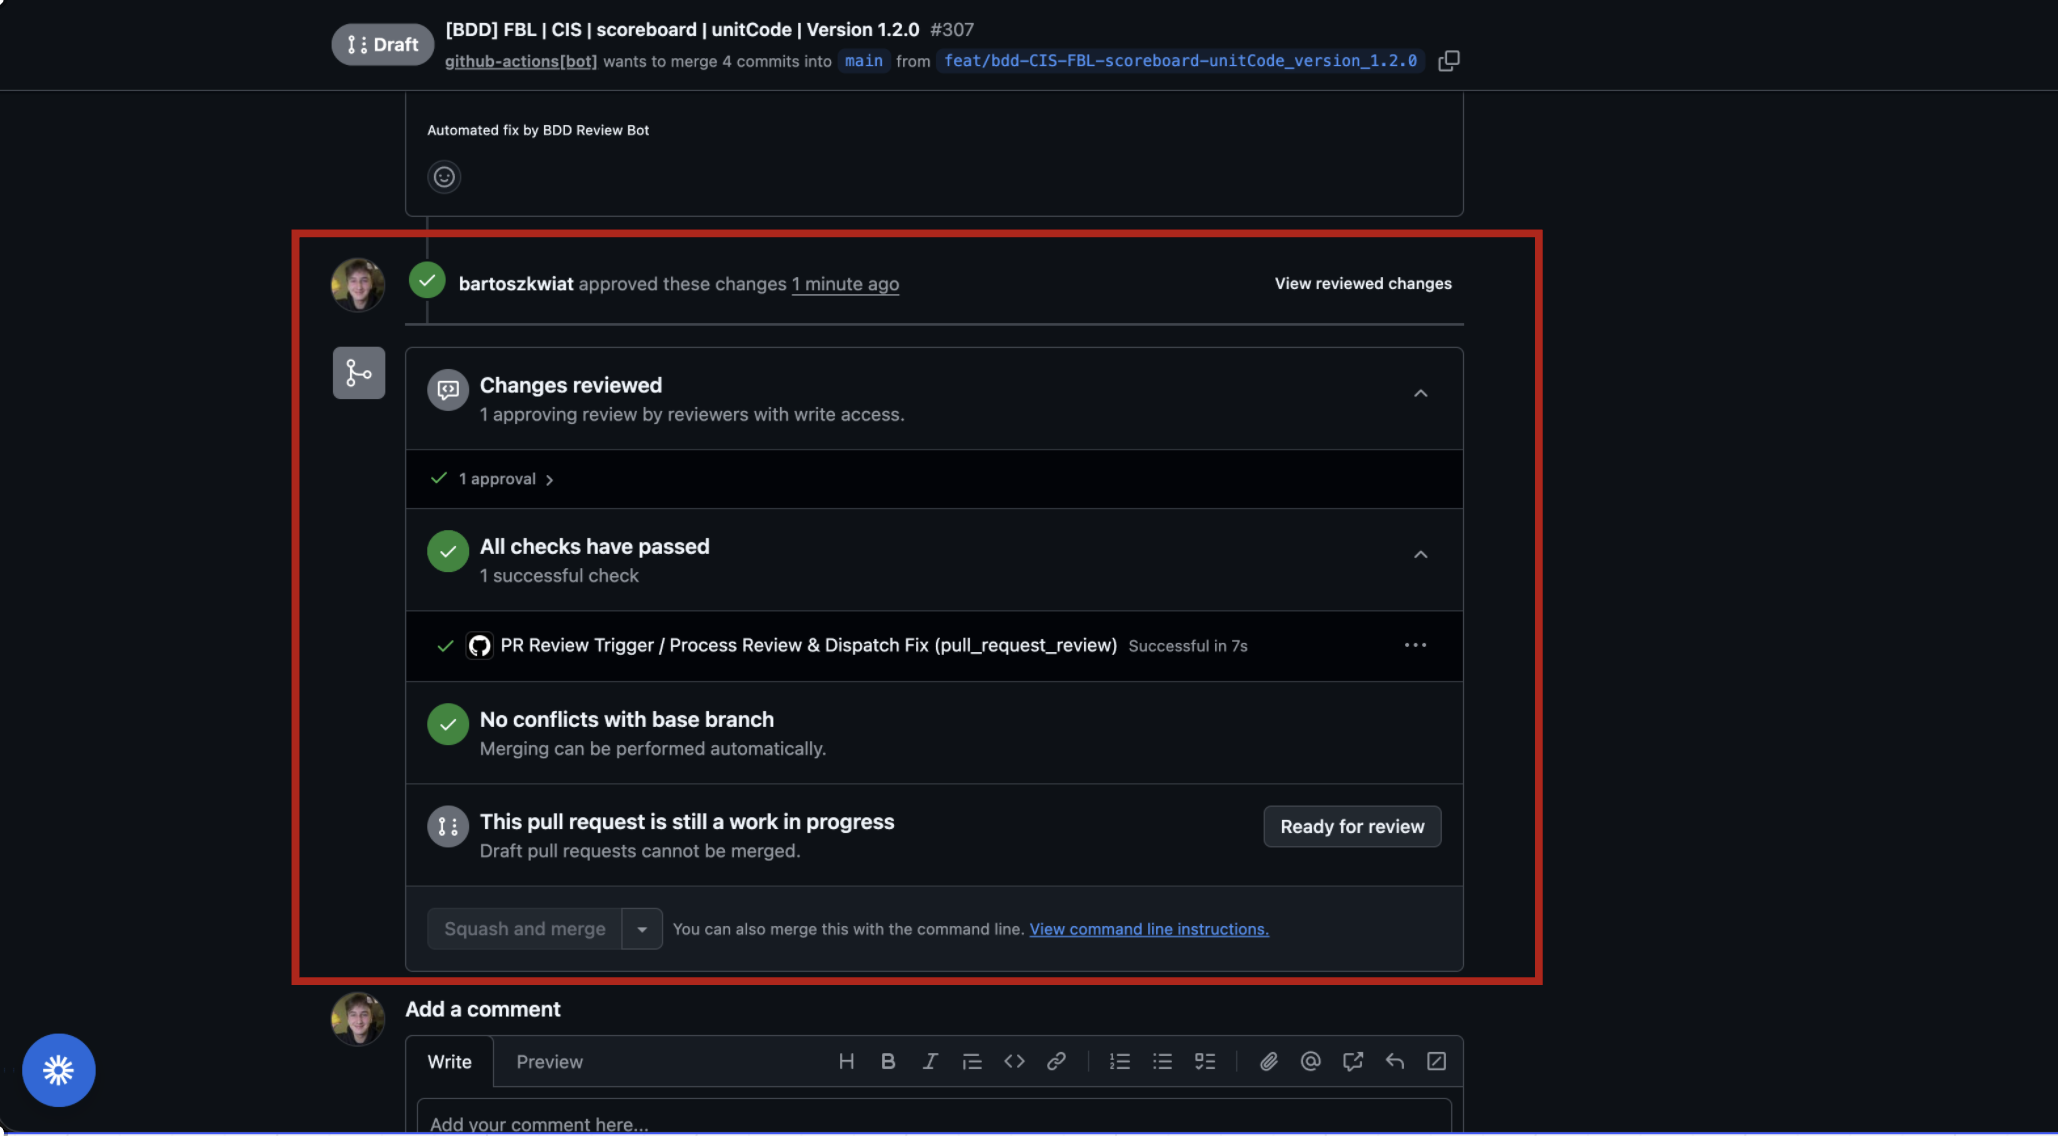
The merge gate now shows:
- ✅ 1 approving review by a reviewer with write access
- ✅ All checks have passed
- ✅ No conflicts with base branch
Do not merge or close the PR yourself. The automated pipeline handles that once the PR moves from Draft to Ready for Review.
Step 9 — Dataset stored and ready for the team
Once approved, the ODF Generator dashboard updates the row to Approved and the dataset ZIP is stored permanently.
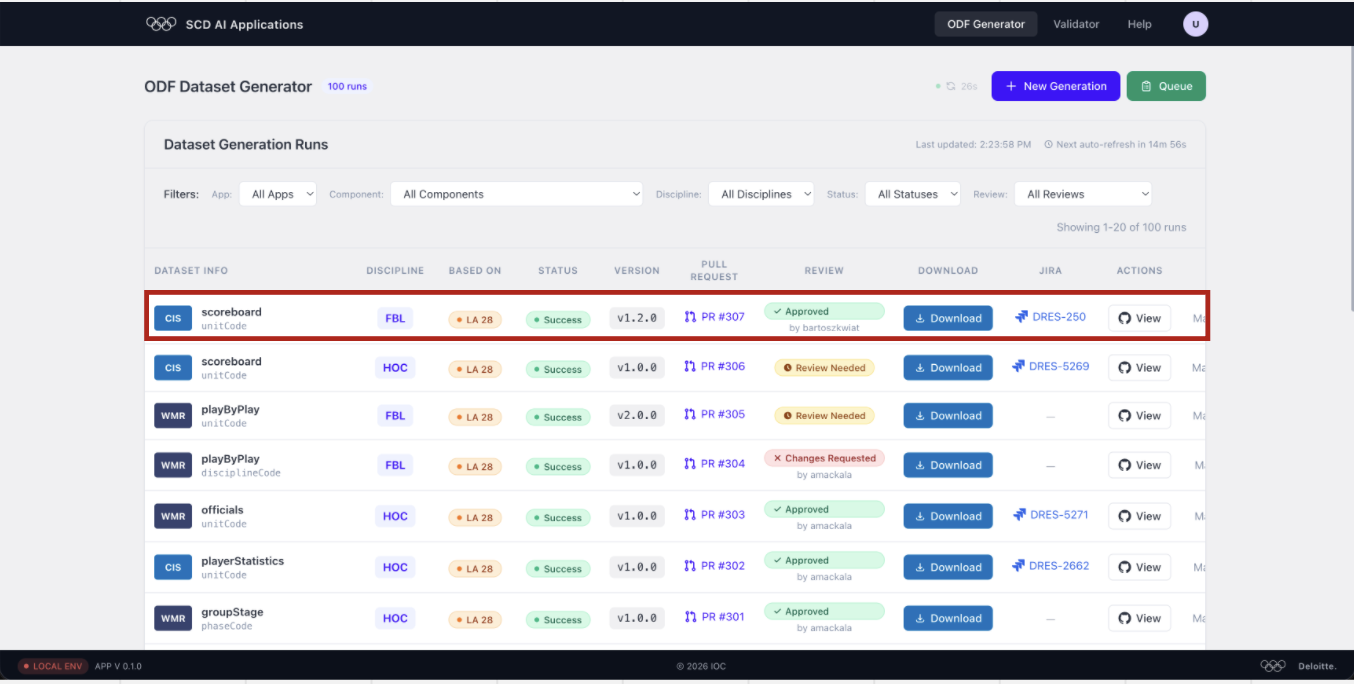
Teammates can now download the dataset directly from the dashboard or find it referenced in the linked JIRA ticket (DRES-250 in this example).