This lesson walks through the whole review flow inside the app, step by step. You don't need GitHub for this — everything happens in the ODF Generator and Reviews screens. Each screenshot below maps to one step.
1. Find a dataset that needs review
Open the ODF Generator dashboard. You are in reviewer mode when the Reviewer badge shows in the top-right corner.
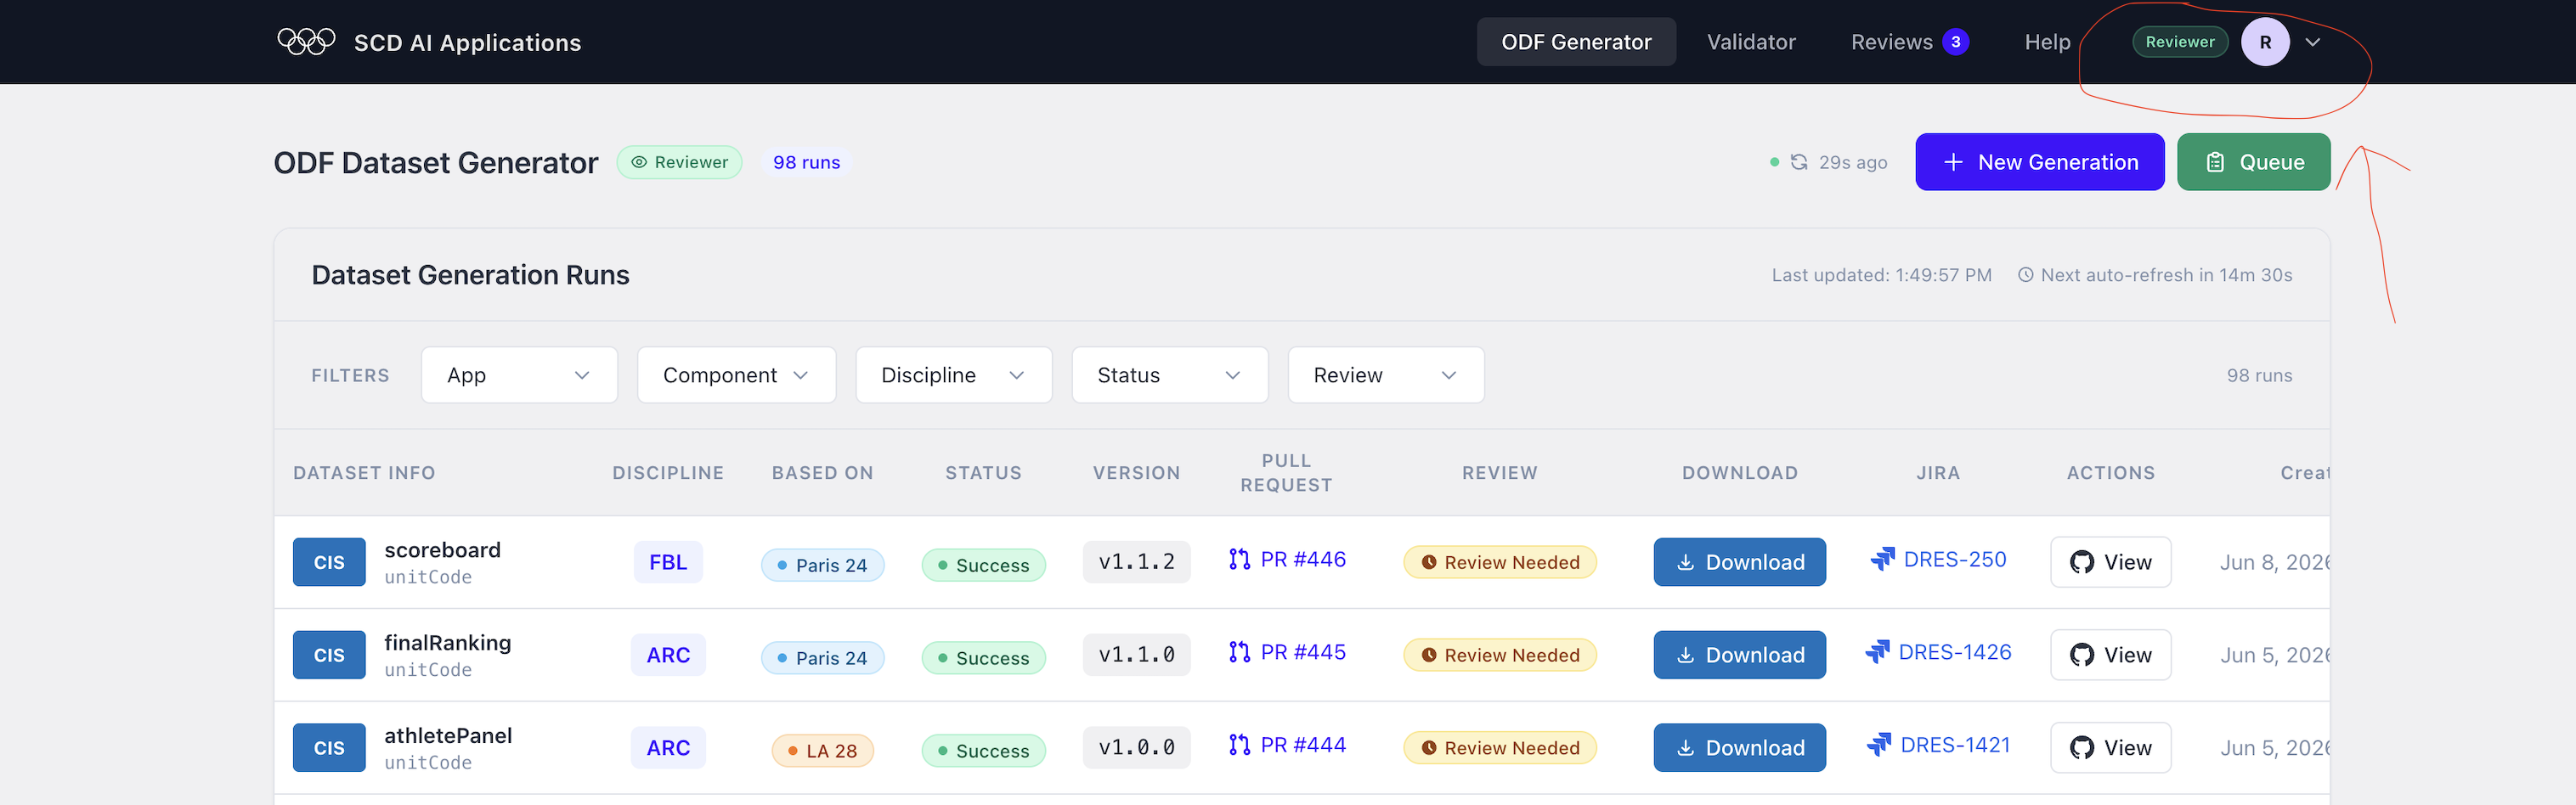
Every generated dataset is one row in the Dataset Generation Runs table. Look at the Review column. A yellow Review Needed badge means that dataset is waiting for someone to review it.
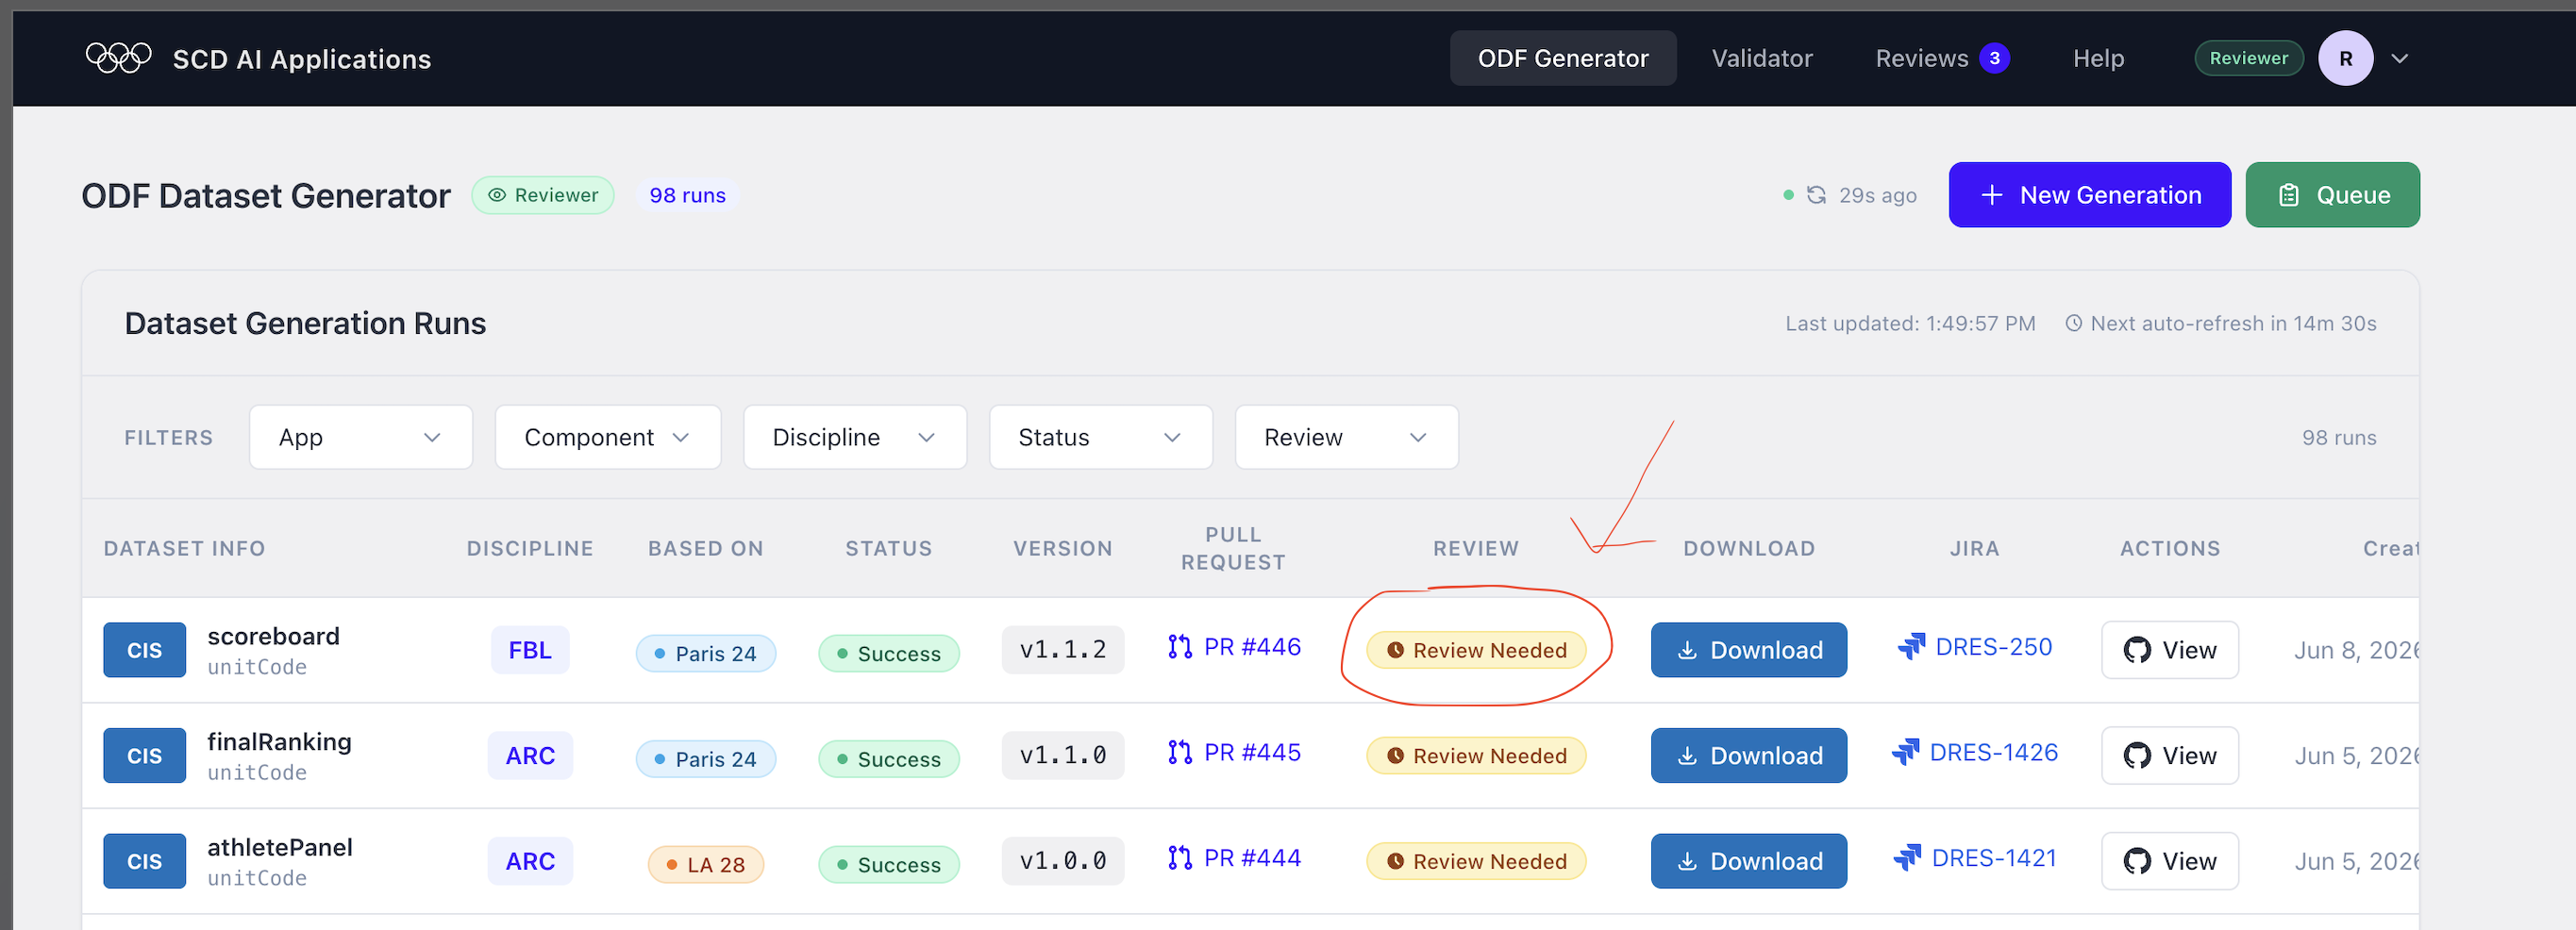
Pick a row with Review Needed and open its review (via the Pull Request link or the Reviews page — see step 8 for resuming later).
2. Understand the review screen
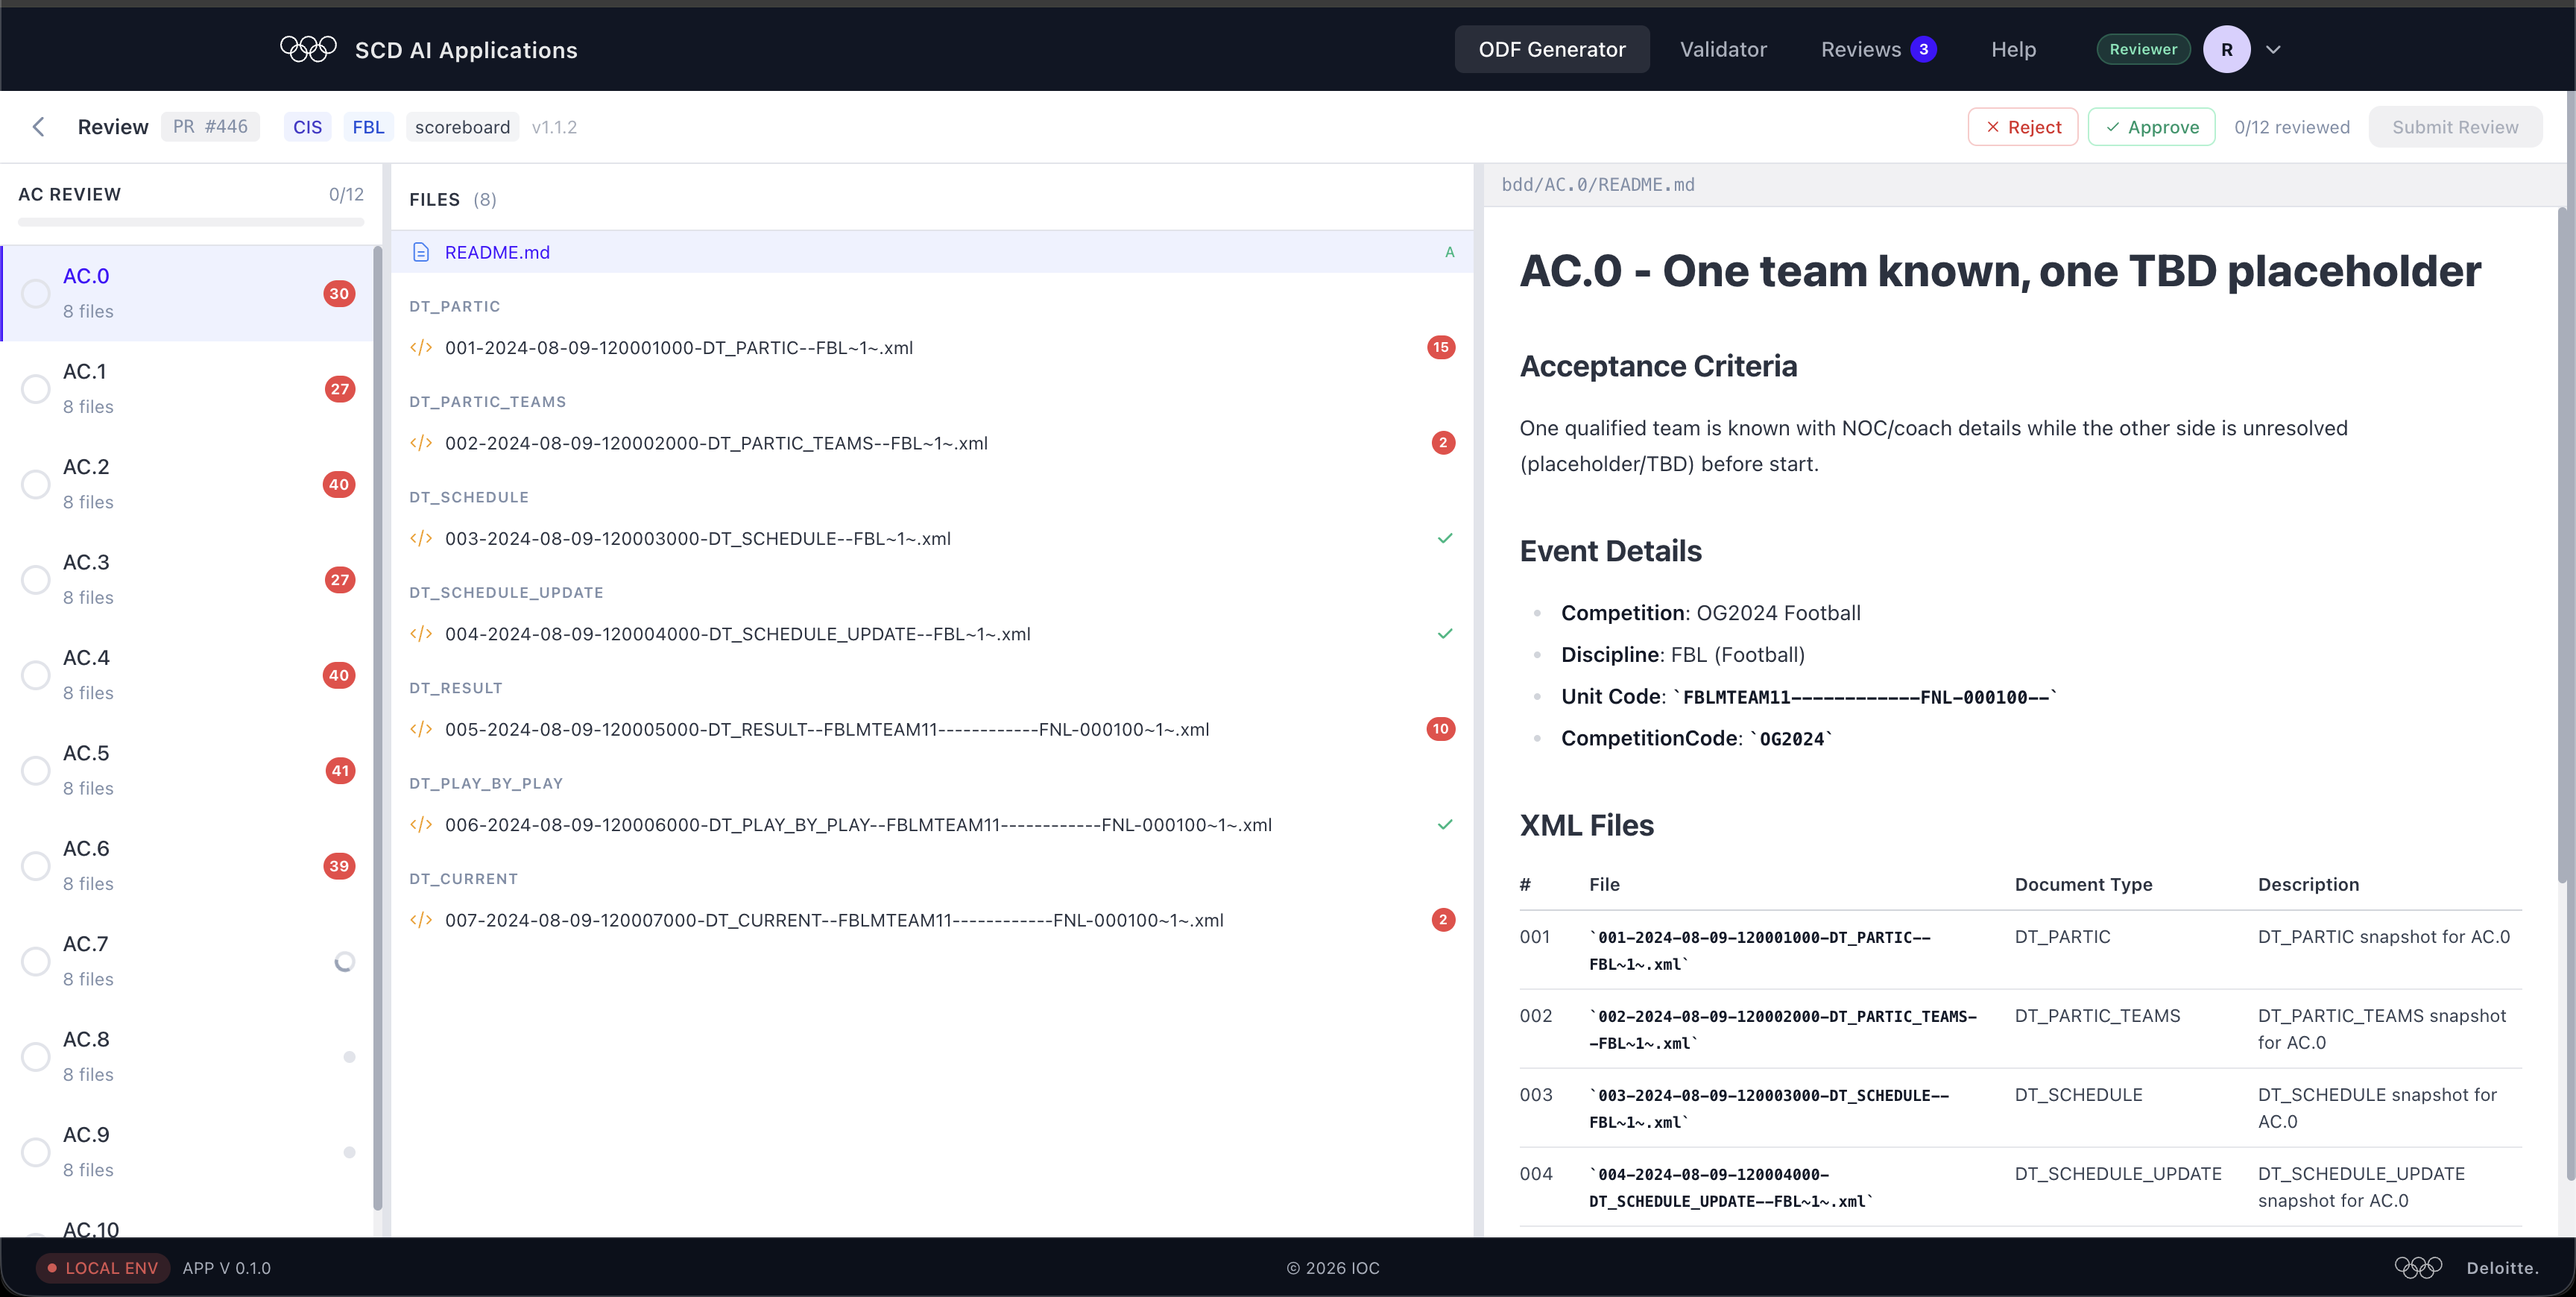
The review screen has three panels:
| Panel | What it shows |
|---|---|
| Left — AC Review | The list of acceptance criteria (AC.0, AC.1, …). Each AC has a set of files. The red number is how many fields still need attention. |
| Middle — Files | The files inside the selected AC: the README.md plus one XML file per document type (DT_PARTIC, DT_SCHEDULE, DT_RESULT, …). A green tick means the file looks clean. |
| Right — Detail | The content of whatever you clicked. For the README it shows the Acceptance Criteria, Event Details, and the list of XML Files. |
The top bar tells you which dataset you are reviewing (PR number, component, discipline) and your progress, e.g. 0/12 reviewed. The Reject, Approve, and Submit Review buttons live in the top-right.
3. Work through each acceptance criterion
Go through the ACs one by one, from top to bottom.
For each AC:
- Open the README.md first and read the Acceptance Criteria — this is what the data is supposed to prove.
- Open each XML file in that AC and check it matches the README.
- Decide if the AC is correct (Approve) or wrong (Reject).
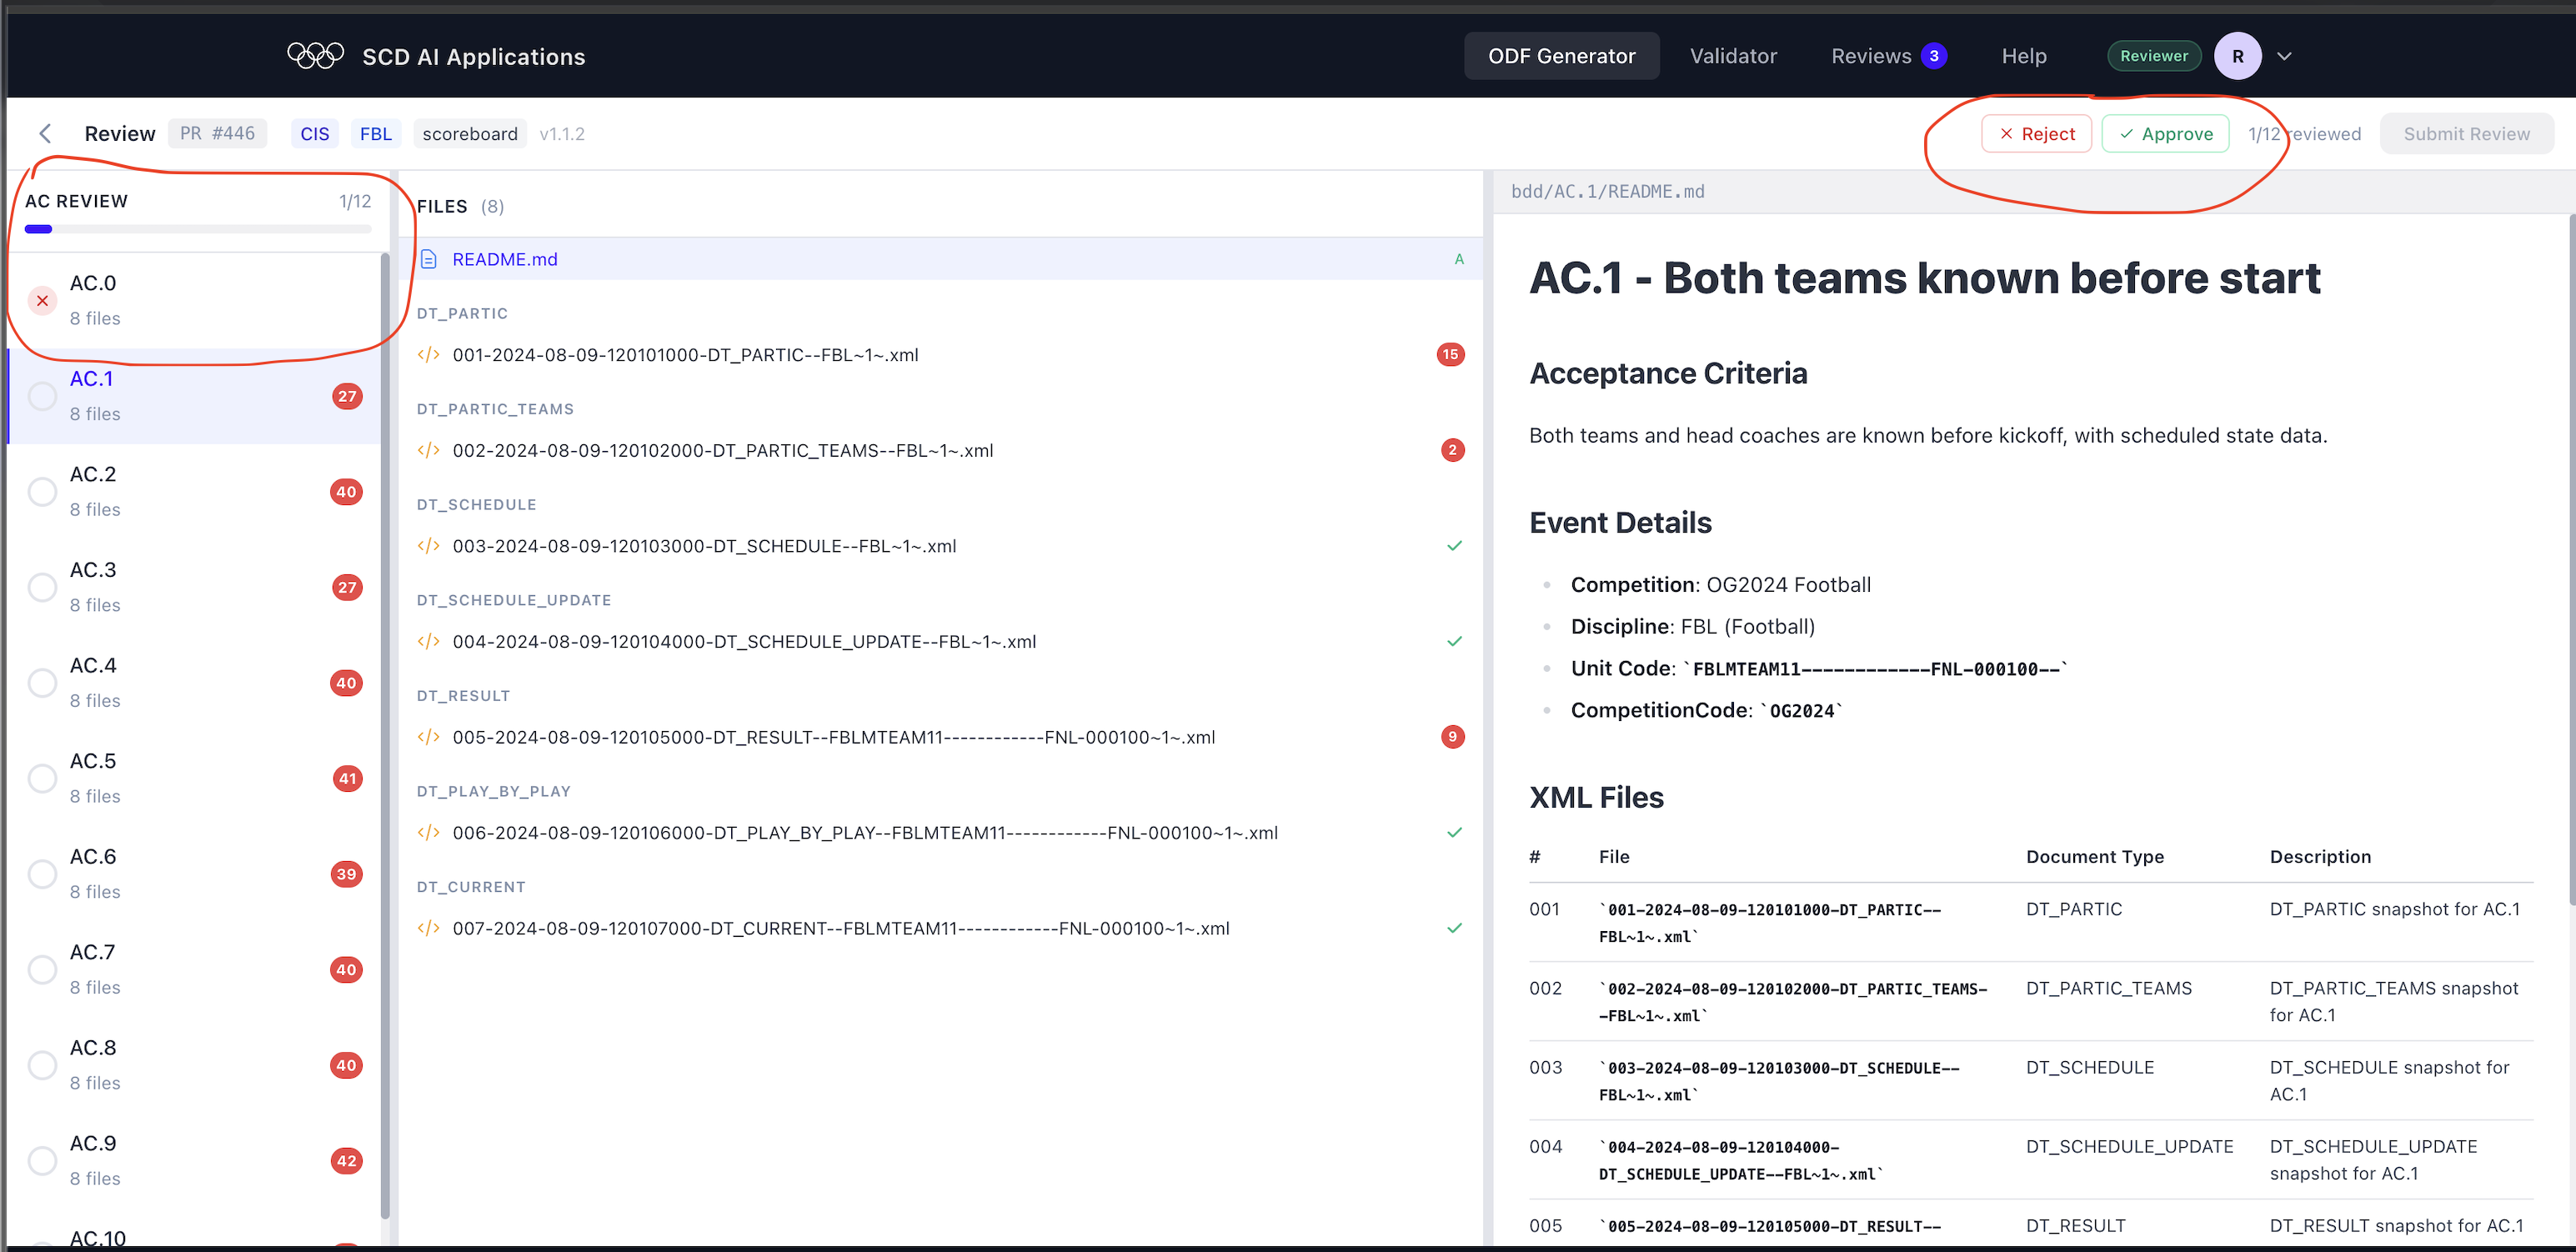
When you approve or reject an AC, the counter at the top goes up (for example 1/12 reviewed) and the AC gets a status icon in the left list (a red ✗ for rejected). This is how you track which ACs are still pending.
4. Read the XML field badges
Open an XML file to inspect it line by line. At the top you get a summary of the fields in that file:
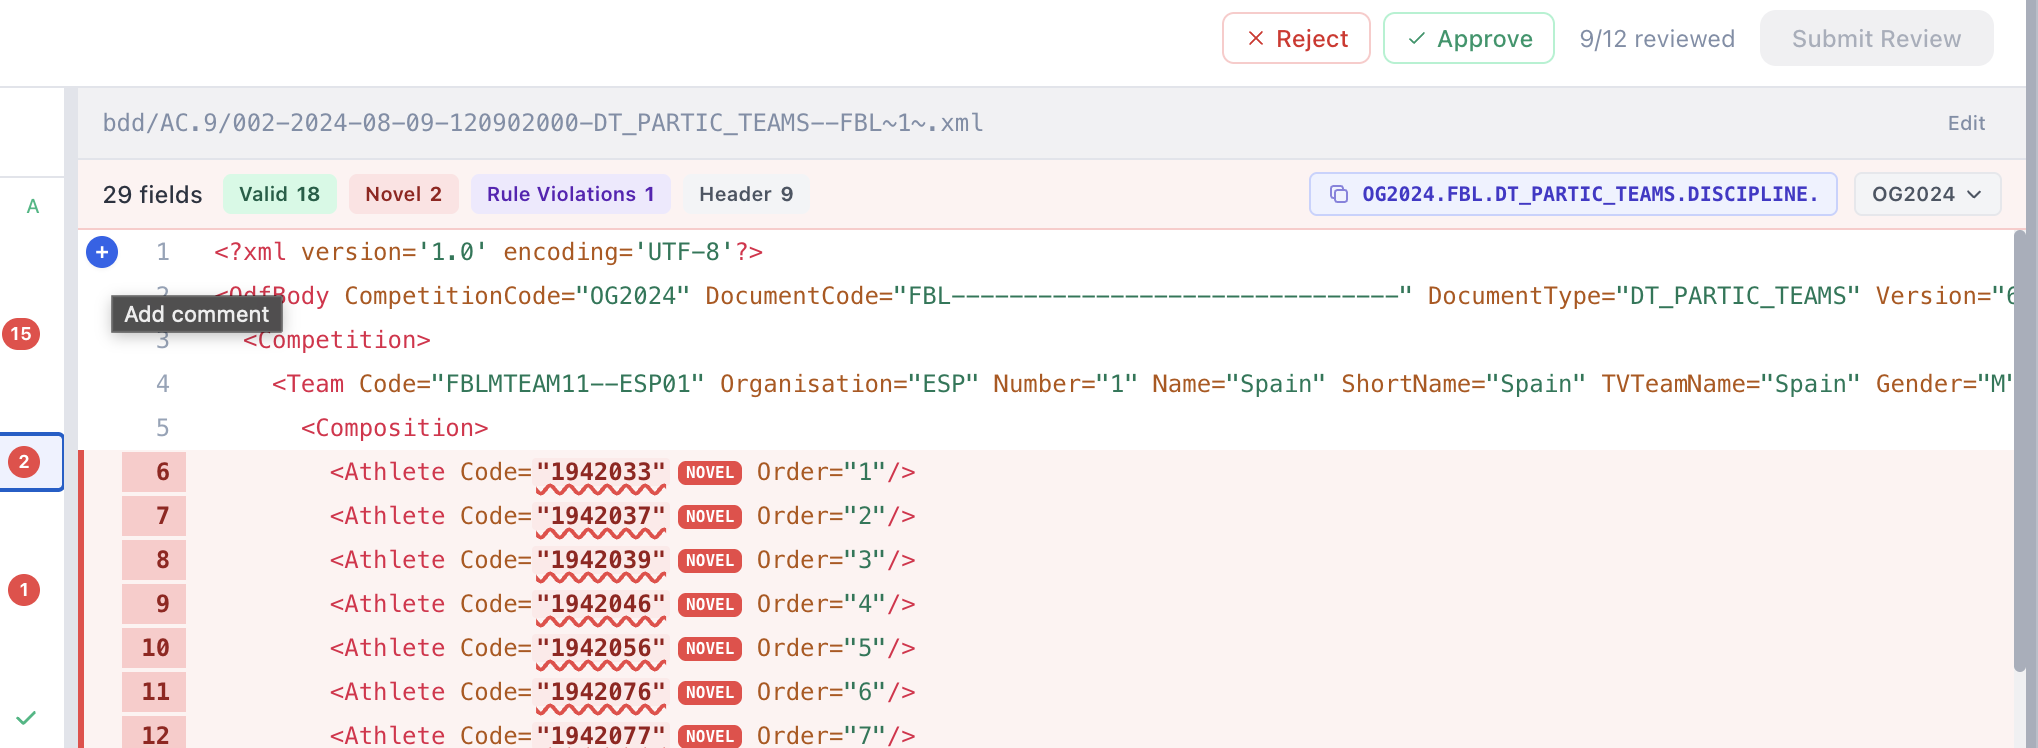
| Badge | Meaning |
|---|---|
| Valid | The field value matches the ODF specification. |
| Novel | A new value the checker hasn't seen before — verify it is correct. |
| Rule Violations | The value breaks a rule and almost certainly needs a fix. |
| Header | Header-level fields of the document. |
Highlighted lines (red background) are the ones that need your attention. Hover the + icon next to a line number to Add comment on that exact line.
5. Add a comment or a suggested fix
Clicking Add comment opens the review comment box. You have two tabs:
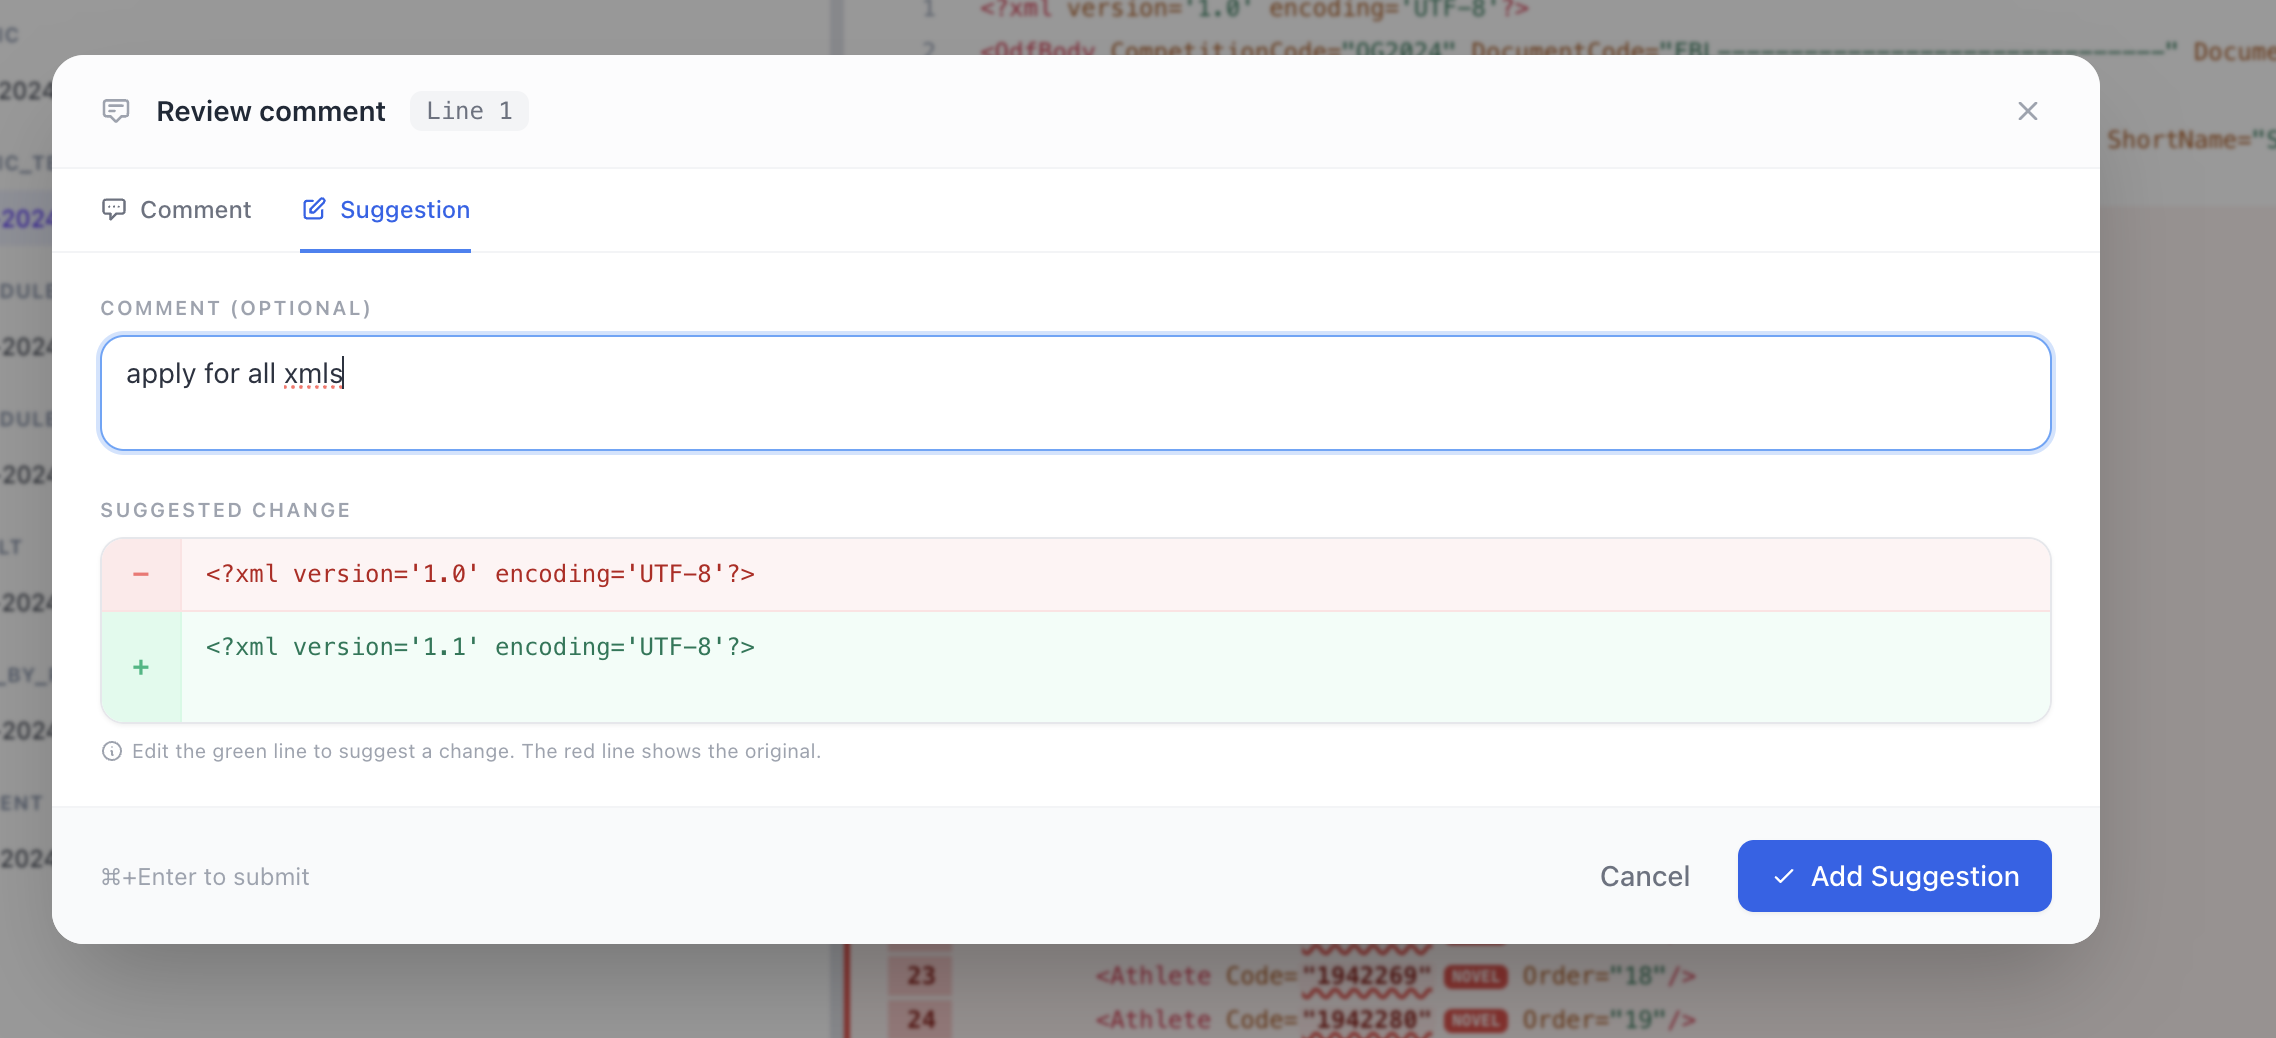
- Comment — leave a plain note (for example, "apply for all xmls").
- Suggestion — propose the exact replacement. The red line is the current value; edit the green line to the value you want. The fix can then be applied directly.
Tip: in the comment text, say how wide the change should apply (this one line, the whole AC, or all XML files) so the fix is applied in the right scope. Press Add Suggestion (or ⌘+Enter) to save it.
6. Approve or reject, then submit
Once you have checked every AC, the progress counter reads 12/12 reviewed.

- If everything is correct → Approve the ACs and submit.
- If you left any comments or rejected any AC → the submit button becomes Submit: Request Changes (red). Use this so the team and the fix bot know changes are needed.
Click the submit button to finish the review.
7. Track and resume your reviews
Open the Reviews tab to see every review you have started.
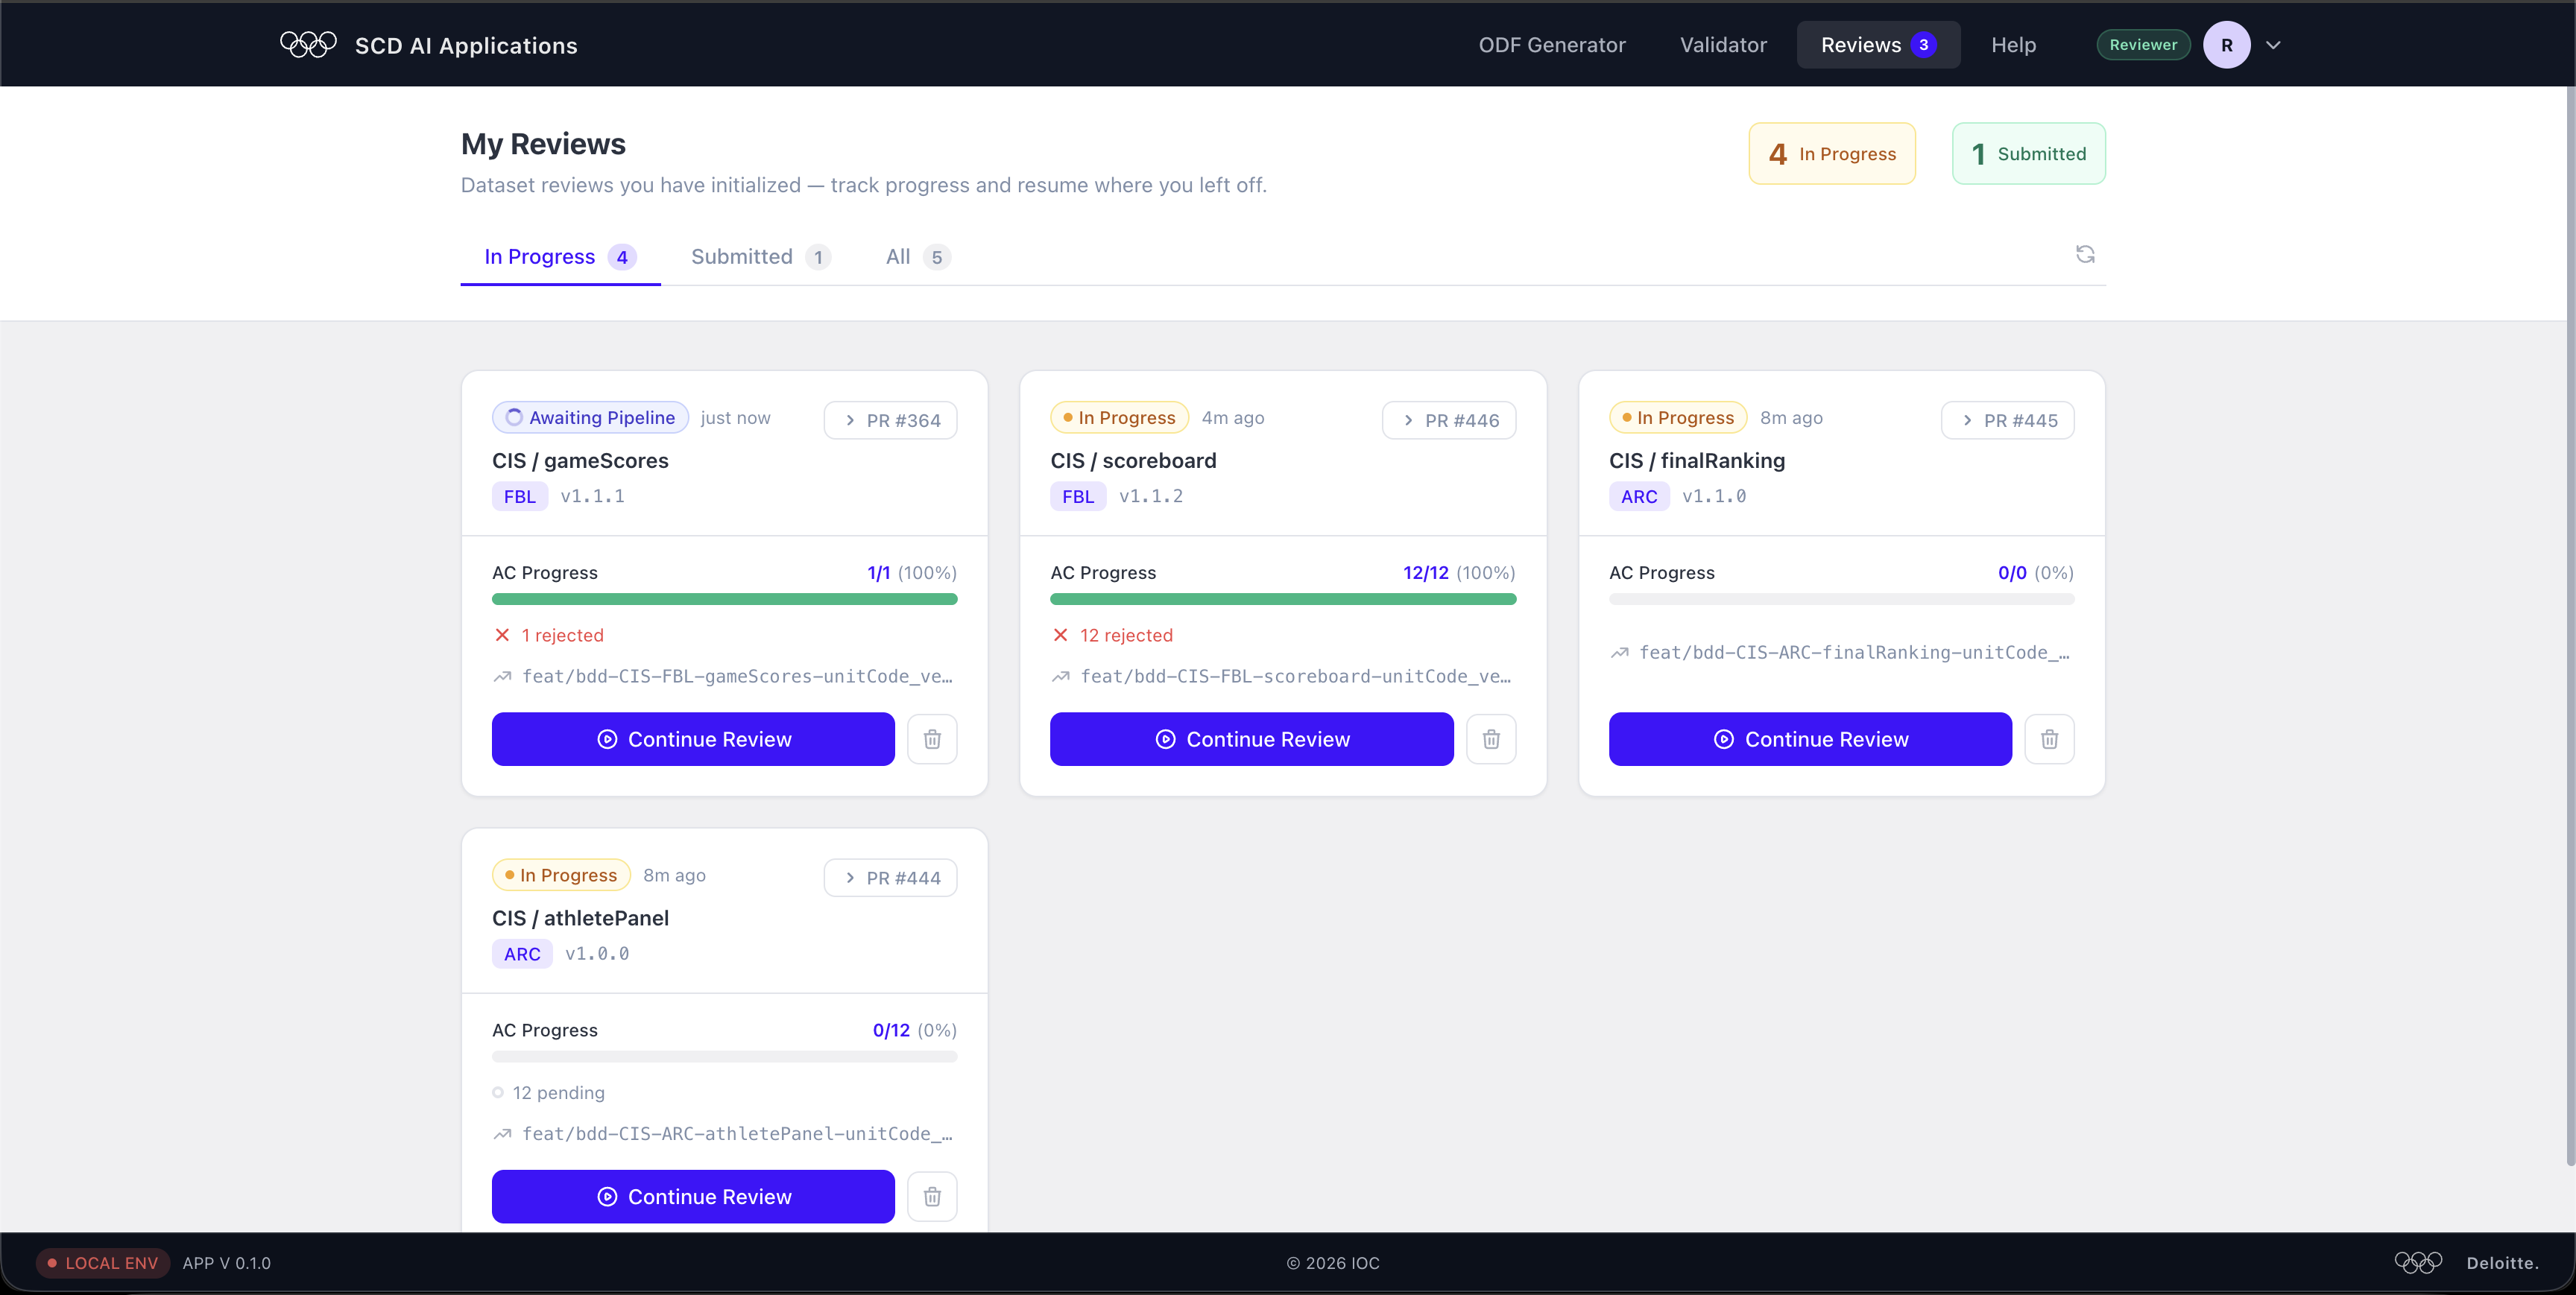
Each card shows:
- The component, discipline, version, and PR number.
- AC Progress — how many ACs you've reviewed (e.g. 12/12 (100%)) and how many were rejected.
- A Continue Review button to jump back in where you left off.
The tabs at the top — In Progress, Submitted, All — let you filter your reviews. Use this page to pick up a review you started earlier and finish it without losing your place.